Hey Y'all!! Happy Friday! How are y'all doing? It's going pretty good here...except that Mother Nature hates me. The yellow scourge is starting here in Georgia. That is literally yellow-green pollen clouds! Over the next couple of weeks, everything is going to be completely covered in the stuff. I won't see it though, what with all the sneezing, nose blowing, and itchy, swollen, watery eyes :( But on to today's post...while I can still see, lol.
Ok, the best name I could come up with for today's mani is the Swoop, lol.
I Used:
Orly: Wild Wisteria, a dark purple, wine colored crème
Orly: Steal The Spotlight, a micro turquoise/teal glitter with medium sized holographic glitter in a clear base
Sadly, the pictures aren't doing this design justice. And of course it was cloudy for days. But I started with two coats of Orly Wild Wisteria. Once that dried, I just used the brush that came with the polish and swooped Orly Steal The Spotlight onto my nail. I started near the cuticle and just swept the polish up and over to create a sort of French tip. Then went back and dabbed polish anywhere that was thin on glitter.
This was such a pretty, glittery mani. And I love the combination of teal/turquoise and purple.
I hope y'all have a wonderful day! Happy Polishing!!
Showing posts with label french tip. Show all posts
Friday, April 3, 2015
Wednesday, April 1, 2015
Red and Gold Sequin and Gradient Mani
Hey Y'all!! Happy Hump Day! How is your week going? Mine is ok. It's that time of year when I'm miserable...pollen. Everywhere! I can't stop sneezing. And the worst part is that the pollen isn't even that bad yet :( But at least I still have a post for you :)
So here is today's mani:
I Used:
OPI: Over & Over A-Gwen, a red crème
OPI: Love. Angel. Music. Baby., a satin gold metallic
Orly: Lavish Bash, a micro gold glitter with holographic bar glitter in a clear base
Red and Gold Sequins
To start this mani, I painted my thumb, pinky and ring finger with OPI Over & Over A-Gwen, a pretty, bright red crème. Then I painted my index and middle fingers with OPI Love. Angel. Music. Baby., a satin finished gold metallic. Once that was all dry, I used the brush that came with the polish to dab on Orly Lavish Bash to form the gradient.
To place the sequins, I used a dotting tool and Seche Vite top coat. I just put a dot of the top coat on my nail where I wanted to place the sequin, then sunk the sequin down into the dot. Try to get the sequin as flat to your nail as you can. Otherwise, they will pop off pretty easily. Then just top off everything with top coat!
I hope you enjoyed today's mani! Happy Polishing!!
So here is today's mani:
I Used:
OPI: Over & Over A-Gwen, a red crème
OPI: Love. Angel. Music. Baby., a satin gold metallic
Orly: Lavish Bash, a micro gold glitter with holographic bar glitter in a clear base
Red and Gold Sequins
To start this mani, I painted my thumb, pinky and ring finger with OPI Over & Over A-Gwen, a pretty, bright red crème. Then I painted my index and middle fingers with OPI Love. Angel. Music. Baby., a satin finished gold metallic. Once that was all dry, I used the brush that came with the polish to dab on Orly Lavish Bash to form the gradient.
To place the sequins, I used a dotting tool and Seche Vite top coat. I just put a dot of the top coat on my nail where I wanted to place the sequin, then sunk the sequin down into the dot. Try to get the sequin as flat to your nail as you can. Otherwise, they will pop off pretty easily. Then just top off everything with top coat!
I hope you enjoyed today's mani! Happy Polishing!!
Friday, March 27, 2015
Purple and Pink Glitter French Tip
Hey Y'all!! TGIF!! I would be excited for it being Friday, except it's really windy and cold today and it's supposed to be in the 20's tonight and tomorrow night. What part of Spring doesn't Mother Nature understand?? I want my shorts back!
So, for today, I have a Purple and Pink Glitter French Tip/Block Mani:
I Used:
OPI: Lost My Bikini in Molokini, a medium purple cream
Butter London: Rosie Lee, a bright micro pink glitter in a clear base
Salon Perfect: Razzle Dazzle, a purple and holographic micro glitter in a purple jelly base
Scotch Tape
I started with two coats of OPI Lost My Bikini in Molokini, a pretty, highly pigmented purple crème. Once that had dried completely, I placed scotch tape across the nail diagonally and painted the color closest to the tip.
Then I placed the tape a little further down the nail and painted the next color. Be sure to only put tape on the outside edge, not over the glitter. Otherwise, you will lift the glitter. And don't worry about going over into the other glitter, it really won't show. You just need the clean edge on the outside.
I love how this turned out. It feels so Spring-like to me. I hope you enjoyed it too!
Happy Polishing!!
So, for today, I have a Purple and Pink Glitter French Tip/Block Mani:
I Used:
OPI: Lost My Bikini in Molokini, a medium purple cream
Butter London: Rosie Lee, a bright micro pink glitter in a clear base
Salon Perfect: Razzle Dazzle, a purple and holographic micro glitter in a purple jelly base
Scotch Tape
I started with two coats of OPI Lost My Bikini in Molokini, a pretty, highly pigmented purple crème. Once that had dried completely, I placed scotch tape across the nail diagonally and painted the color closest to the tip.
Then I placed the tape a little further down the nail and painted the next color. Be sure to only put tape on the outside edge, not over the glitter. Otherwise, you will lift the glitter. And don't worry about going over into the other glitter, it really won't show. You just need the clean edge on the outside.
I love how this turned out. It feels so Spring-like to me. I hope you enjoyed it too!
Happy Polishing!!
Monday, February 24, 2014
Black & Purple Gradient French Tips
Hey Y'all!! Happy Monday! I know, I know, that's an oxymoron, but I hope you're having a great day. I'm excited to start a new week, anyway. I have some fabulous posts for you this week, including a couple of beauty reviews, so be sure to be on the look out for them!
I'm also excited to show you today's nails! I'm going to call this Black & Purple Gradient French Tips:
I Used:
Finger Paints- First Edition (dark neon purple crème)
Sinful Colors- Black on Black (black crème)
Make Up Sponge
To create this design, start with two coats of Finger Paints First Edition, a gorgeous dark purple neon crème. Once that has dried completely, cut up a make up sponge, the wedge type (I buy mine at the dollar store). I just cut it into 3 or 4 pieces. Then run them under the faucet and wring them out. This makes them bigger and gives a softer look to your gradient.
Then paint a stripe of Finger Paints First Edition and a stripe of Sinful Colors Black on Black on to the sponge:
Doing both colors helps them to blend together. Then just dab on to your nails. If you want the French Tip look, make sure you keep the black just on the tip of your nails. You may need to do this two or three times to get the colors opaque. Then just top with top coat!
I hope y'all enjoyed today's mani; I got a ton of compliments on it! Y'all have a fabulous Monday! Happy Polishing!!
I'm also excited to show you today's nails! I'm going to call this Black & Purple Gradient French Tips:
I Used:
Finger Paints- First Edition (dark neon purple crème)
Sinful Colors- Black on Black (black crème)
Make Up Sponge
To create this design, start with two coats of Finger Paints First Edition, a gorgeous dark purple neon crème. Once that has dried completely, cut up a make up sponge, the wedge type (I buy mine at the dollar store). I just cut it into 3 or 4 pieces. Then run them under the faucet and wring them out. This makes them bigger and gives a softer look to your gradient.
Then paint a stripe of Finger Paints First Edition and a stripe of Sinful Colors Black on Black on to the sponge:
Doing both colors helps them to blend together. Then just dab on to your nails. If you want the French Tip look, make sure you keep the black just on the tip of your nails. You may need to do this two or three times to get the colors opaque. Then just top with top coat!
I hope y'all enjoyed today's mani; I got a ton of compliments on it! Y'all have a fabulous Monday! Happy Polishing!!
Monday, January 20, 2014
Gwen Stefani French Tips
Hey Y'all!! First, wow!! Thank you for all the love on facebook!! I hit 1,100 likes this weekend and am thrilled!!! Thank you, thank you!! I'm gonna start collecting goodies for a Thank You Giveaway!!
That was the icing on an already fabulous weekend! See, today is my wedding anniversary. 24 years today. I was 5 when we got married. No, seriously, I was. Would I lie to you? Anyway, the hubby took me shopping. We hit Saks Fifth Avenue and Sephora. But before that, we went to lunch at our absolute favorite Italian restaurant, Ippolito's! Yummy!! That's where I ate a ton of garlic. Garlic makes me burp. Garlic makes me burp like a 300 pound man named Bubba. That explains why, in the middle of Saks Fifth Avenue, I let loose with a burp that would put any Bubba to shame. Yep. I did that. I also quickly looked at my husband with a disgusted look and said, "Really? Control yourself!" Yep, I did that too!
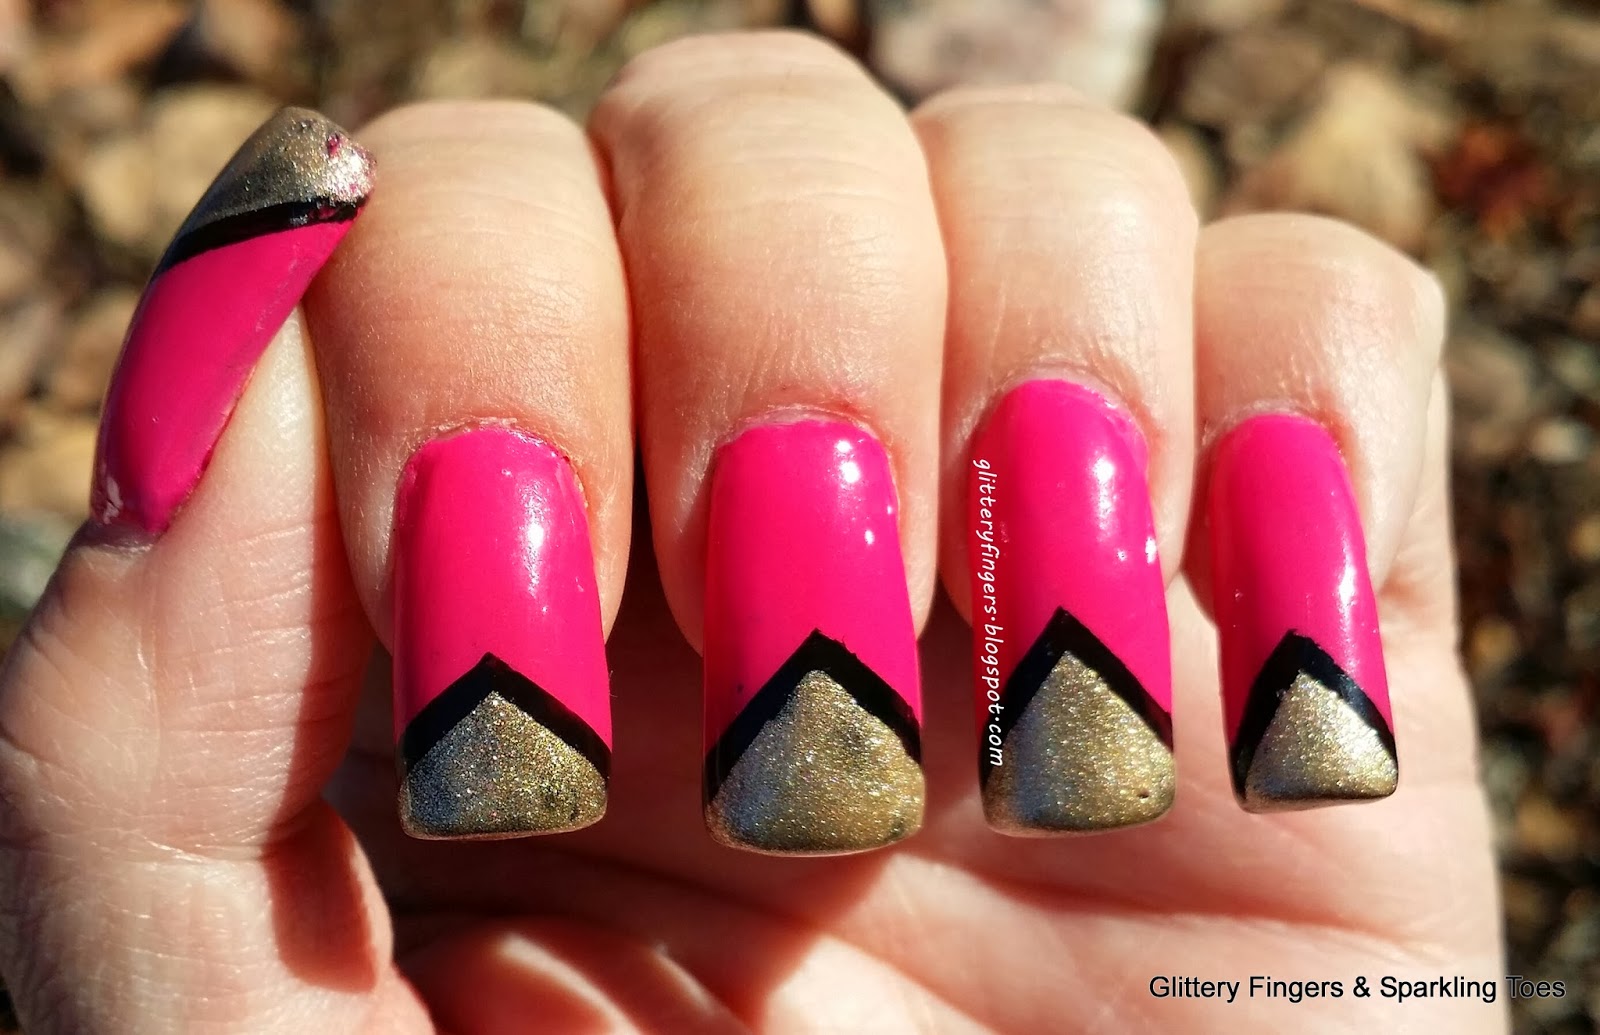
Ok, on to today's post. Today I have French Tips using the new OPI Gwen Stefani collection:
I Used:
OPI- Hey Baby (bright pink crème)
OPI- Love. Angel. Music. Baby (gold shimmer satin finish)
China Glaze- Liquid Leather (black crème)
Striping Tape
This was a fun and easy mani to do, it just takes a little patience because you have to wait for each color to completely dry before moving on to the next step. (I'll do a review of the polishes on a later post)
To start, paint two coats of OPI Hey Baby. Remember to let it dry completely. Then using striping tape (or you could use scotch tape), tape off a wide V at your nail tip:
Fill in with your black polish and immediately remove the tape and let dry. Then tape off all but a small edge of the black V:
Then fill in with OPI Love. Angel. Music. Baby. Remove the tape immediately. Now you can either leave it just like this to keep the satin finish of the gold, or use a top coat over the whole design. I used a top coat because I wanted to wear this for a couple of days and wanted to make sure it would last.
I hope y'all enjoyed today's design! And thanks so much for stopping by!! I'll be back tomorrow with a Try It On Tuesday polish. And remember, if you tell anyone about the burp in Saks....my hubby did it!
Happy Polishing!!
That was the icing on an already fabulous weekend! See, today is my wedding anniversary. 24 years today. I was 5 when we got married. No, seriously, I was. Would I lie to you? Anyway, the hubby took me shopping. We hit Saks Fifth Avenue and Sephora. But before that, we went to lunch at our absolute favorite Italian restaurant, Ippolito's! Yummy!! That's where I ate a ton of garlic. Garlic makes me burp. Garlic makes me burp like a 300 pound man named Bubba. That explains why, in the middle of Saks Fifth Avenue, I let loose with a burp that would put any Bubba to shame. Yep. I did that. I also quickly looked at my husband with a disgusted look and said, "Really? Control yourself!" Yep, I did that too!
Ok, on to today's post. Today I have French Tips using the new OPI Gwen Stefani collection:
I Used:
OPI- Hey Baby (bright pink crème)
OPI- Love. Angel. Music. Baby (gold shimmer satin finish)
China Glaze- Liquid Leather (black crème)
Striping Tape
This was a fun and easy mani to do, it just takes a little patience because you have to wait for each color to completely dry before moving on to the next step. (I'll do a review of the polishes on a later post)
To start, paint two coats of OPI Hey Baby. Remember to let it dry completely. Then using striping tape (or you could use scotch tape), tape off a wide V at your nail tip:
Fill in with your black polish and immediately remove the tape and let dry. Then tape off all but a small edge of the black V:
Then fill in with OPI Love. Angel. Music. Baby. Remove the tape immediately. Now you can either leave it just like this to keep the satin finish of the gold, or use a top coat over the whole design. I used a top coat because I wanted to wear this for a couple of days and wanted to make sure it would last.
I hope y'all enjoyed today's design! And thanks so much for stopping by!! I'll be back tomorrow with a Try It On Tuesday polish. And remember, if you tell anyone about the burp in Saks....my hubby did it!
Happy Polishing!!
Monday, December 30, 2013
New Year's Eve Waterfall
Hey Y'all!! I'm back!! Sorry for being gone since last Wednesday, but Mr. Glittery had the rest of the week off so we spent some family time together. Christmas was pretty great. It was just us this year, so it was quiet and calm, lol. I even got some things from my wish list! Some will be making an appearance soon. So how was your Christmas?? Did you get what you were hoping for? Are you ready for 2013 to be over? Are you going to any parties? Have I asked you enough questions??
Probably, lol. So let's get right to the nail design. Today I have a New Year's Eve Waterfall for you:
I Used:
China Glaze- Liquid Leather (black crème)
Pure Ice- Silver Mercedes (silver foil)
Pure Ice- Jaguar (gold foil)
Liner Brush
Let me start by saying, I do my waterfall designs a little different than everyone else. Everyone else makes very close lines that are all, basically, the same length and width and tend to not end in a point but are more blunt. I love that look. I like to do mine with vary lengths, widths and tapered points. That's just me. I have to be different o_O! You can do yours however you like. There your nails! Have fun with it.
I started with three coats of China Glaze Liquid Leather. Yep, three coats. My one constant concern with China Glaze polish is that it tends to be thin, and this batch of Liquid Leather was really thin! Then just take a thin brush and, alternating silver and gold, paint thin lines from your tip towards your cuticle, lifting the brush as you go.
That's it! I love this look for New Year's Eve. It's subtle glitz. Of course you can glam this up or down as much as you like. To make it even more subtle, try using darker colors like blue and purple. Or glam it up with silver and gold shimmers or glitters. Make it your own!
I have a few more New Year's Eve designs coming up or you, so be on the lookout! Until then, Happy Polishing!!
Probably, lol. So let's get right to the nail design. Today I have a New Year's Eve Waterfall for you:
I Used:
China Glaze- Liquid Leather (black crème)
Pure Ice- Silver Mercedes (silver foil)
Pure Ice- Jaguar (gold foil)
Liner Brush
Let me start by saying, I do my waterfall designs a little different than everyone else. Everyone else makes very close lines that are all, basically, the same length and width and tend to not end in a point but are more blunt. I love that look. I like to do mine with vary lengths, widths and tapered points. That's just me. I have to be different o_O! You can do yours however you like. There your nails! Have fun with it.
I started with three coats of China Glaze Liquid Leather. Yep, three coats. My one constant concern with China Glaze polish is that it tends to be thin, and this batch of Liquid Leather was really thin! Then just take a thin brush and, alternating silver and gold, paint thin lines from your tip towards your cuticle, lifting the brush as you go.
That's it! I love this look for New Year's Eve. It's subtle glitz. Of course you can glam this up or down as much as you like. To make it even more subtle, try using darker colors like blue and purple. Or glam it up with silver and gold shimmers or glitters. Make it your own!
I have a few more New Year's Eve designs coming up or you, so be on the lookout! Until then, Happy Polishing!!
Monday, December 9, 2013
Festive French Tips (Black & Gold)
Hey Y'all! Happy Monday! Did y'all have a great weekend? Do you have all of your Christmas shopping done? I've barely started :( And I haven't gotten anything for the hubby yet. He's so hard to buy for. He's all, "I don't need anything. I just want y'all to have what you want." Is your mister like this?? Sounds all kind and stuff, but the now-a-teen and I wanna give him presents! We like that! Grrrr.... We should get him something hideous, then maybe he will tell us what he really wants.
Oh well, on to the nails! Today I went with nails a little different for the holidays. I think they still look festive, but if you're tired of red and green this gives you another idea. I also think these would be great for New Year's Eve. So I have black and gold French tips:
I Used:
China Glaze- Liquid Leather (black crème)
China Glaze- Mingle With Kringle (gold glass fleck)
Scotch Tape
Liner Brush
Super easy & super holiday-ish! Start with two coats of China Glaze Liquid Leather. Once that has completely dried, lay scotch tape down where you want the tip to be. You can do it right on your nail line, or you can do it like I did and put it a little closer to your nail edge. Paint the Mingle With Kringle and immediately remove the tape.
Dab a little polish onto a piece of paper or paper plate first. Then using a thin liner brush, just draw little wisps...sweep the gold into black and the black into the gold.
Hope y'all enjoyed today's mani! Happy Polishing!!!
Oh well, on to the nails! Today I went with nails a little different for the holidays. I think they still look festive, but if you're tired of red and green this gives you another idea. I also think these would be great for New Year's Eve. So I have black and gold French tips:
I Used:
China Glaze- Liquid Leather (black crème)
China Glaze- Mingle With Kringle (gold glass fleck)
Scotch Tape
Liner Brush
Super easy & super holiday-ish! Start with two coats of China Glaze Liquid Leather. Once that has completely dried, lay scotch tape down where you want the tip to be. You can do it right on your nail line, or you can do it like I did and put it a little closer to your nail edge. Paint the Mingle With Kringle and immediately remove the tape.
Dab a little polish onto a piece of paper or paper plate first. Then using a thin liner brush, just draw little wisps...sweep the gold into black and the black into the gold.
Hope y'all enjoyed today's mani! Happy Polishing!!!
Monday, November 25, 2013
Thanksgiving (Fall) French Tips
Hey Y'all!! I'm sorry this is so late! The now-a-teen and I went out to finish up the shopping for Thanksgiving and time just got away from us. So let me get right to it...today I have French tips that would be great for Thanksgiving or Fall:
And on shorter nails:
I Used:
Butter London- Cuppa (very light beige crème)
Butter London- Shag (rusty brown shimmer)
Scotch Tape
I started this mani by painting all of my nails with Butter London Cuppa, a pretty light/almost white beige crème. Once that had dried completely, I used scotch tape to make the French tips (click here for the directions on how to tape of a French tip). I used Butter London Shag, a shimmery rusty brown for the tips. Both polishes were great. There was streaking and balding on the first coat, but everything evened out on the second coat. And yes, I had to do two coats for both colors. The one big disappointment is the wearing...you can see it on my thumb nail in the picture above. These photos were taken just about 20 hours after I put it on.
Don't forget the top coat!! And be sure to come back tomorrow for another Thanksgiving/Fall mani. Happy Polishing!!
And on shorter nails:
I Used:
Butter London- Cuppa (very light beige crème)
Butter London- Shag (rusty brown shimmer)
Scotch Tape
I started this mani by painting all of my nails with Butter London Cuppa, a pretty light/almost white beige crème. Once that had dried completely, I used scotch tape to make the French tips (click here for the directions on how to tape of a French tip). I used Butter London Shag, a shimmery rusty brown for the tips. Both polishes were great. There was streaking and balding on the first coat, but everything evened out on the second coat. And yes, I had to do two coats for both colors. The one big disappointment is the wearing...you can see it on my thumb nail in the picture above. These photos were taken just about 20 hours after I put it on.
Don't forget the top coat!! And be sure to come back tomorrow for another Thanksgiving/Fall mani. Happy Polishing!!
Thursday, August 29, 2013
Mish Mash Challenge: Music
Hey Y'all!!! Ok, so it's actually Thursday and I'm a day late on my Mish Mash Challenge...sorry!! The now-a-teen was nice enough to share her cold with me and all I could do yesterday was sleep. But better late than never, right?? This is going to be a quick post, so I can hopefully get the next post up today...Orly's newest collection (hint: I'm loving them!!)
So this week's prompt was Music. I had a lot of ideas, but due to the cold and incredible sleepiness, I went with something simple:
I Used:
Orly- Liquid Vinyl (black crème)
Sinful Color- Snow Me White (white crème)
Dotting Tool
Liner Brush
Although it wasn't my original plan, I do love my music note French mani. I think it's cute.
I can't wait to see what all the other fabulous ladies have come up with. Just click on the thumbnails below and it will take you to their posts...that's where I'm headed!! I hope y'all have a great day!! Happy Polishing!!
So this week's prompt was Music. I had a lot of ideas, but due to the cold and incredible sleepiness, I went with something simple:
I Used:
Orly- Liquid Vinyl (black crème)
Sinful Color- Snow Me White (white crème)
Dotting Tool
Liner Brush
Although it wasn't my original plan, I do love my music note French mani. I think it's cute.
I can't wait to see what all the other fabulous ladies have come up with. Just click on the thumbnails below and it will take you to their posts...that's where I'm headed!! I hope y'all have a great day!! Happy Polishing!!
Monday, August 12, 2013
Glitter French Tip
Hi Y'all!! Happy Monday!! Ugh, I know Monday. But it's a whole new week, bright and fresh with a clean slate. That's good, right?
And I wanted a bright start to the week, so here is my glitter French tip:
I Used:
Nina Ultra Pro- Pearly Brights (neon pink with blue shimmer)
Heart 2 Art- #33041 (blue diamond shaped holographic glitter)
Seche Vite Top Coat
Orangewood Stick
I bought a few of those Heart 2 Art packages at Walmart (because I loved the glitter) and was dying to try them I used the diamond shaped blue holographic glitter from package #33014 (I already removed the blue glitter when I took the package):
I started with two coats of Nina Ultra Pro Pearly Brights (click here for review) When that dried, it was time to start placing the glitter. I started with using the orangewood stick (toothpick would work perfectly) to place the Seche Vite top coat where I wanted the glitter, and using the same stick, I picked up the glitter individually and placed it on the nail. My pinky shows the glitter applied that way:
Pretty, neat, orderly...pain in the tush to do. I got bored with doing it that way very quickly. So then I painted the top coat where I wanted the glitter, and dipped my finger into the glitter. Then using a soft, clean brush, I brushed the excess glitter away. Not as neat, but it goes way faster and I still like the results. Y'all can do it either way you like :) Just be sure to tap down the glitter to avoid having any of it stick up.
Then I used to coats of Seche Vite as top coat. Pictures don't do the glitter justice. It's a gorgeous glitter! Sadly there wasn't any sun to capture all the sparkly goodness, but trust me, it's there. The Heart 2 Art packages are $2.49 each and can be found at Walmart. Hope y'all enjoyed today's mani! I'll see you tomorrow for Try It On Tuesday!! Happy Polishing!!
And I wanted a bright start to the week, so here is my glitter French tip:
I Used:
Nina Ultra Pro- Pearly Brights (neon pink with blue shimmer)
Heart 2 Art- #33041 (blue diamond shaped holographic glitter)
Seche Vite Top Coat
Orangewood Stick
I bought a few of those Heart 2 Art packages at Walmart (because I loved the glitter) and was dying to try them I used the diamond shaped blue holographic glitter from package #33014 (I already removed the blue glitter when I took the package):
I started with two coats of Nina Ultra Pro Pearly Brights (click here for review) When that dried, it was time to start placing the glitter. I started with using the orangewood stick (toothpick would work perfectly) to place the Seche Vite top coat where I wanted the glitter, and using the same stick, I picked up the glitter individually and placed it on the nail. My pinky shows the glitter applied that way:
Pretty, neat, orderly...pain in the tush to do. I got bored with doing it that way very quickly. So then I painted the top coat where I wanted the glitter, and dipped my finger into the glitter. Then using a soft, clean brush, I brushed the excess glitter away. Not as neat, but it goes way faster and I still like the results. Y'all can do it either way you like :) Just be sure to tap down the glitter to avoid having any of it stick up.
Then I used to coats of Seche Vite as top coat. Pictures don't do the glitter justice. It's a gorgeous glitter! Sadly there wasn't any sun to capture all the sparkly goodness, but trust me, it's there. The Heart 2 Art packages are $2.49 each and can be found at Walmart. Hope y'all enjoyed today's mani! I'll see you tomorrow for Try It On Tuesday!! Happy Polishing!!
Wednesday, July 31, 2013
Mish Mash Challenge: Purple
I'm so excited I can barely stand it!!! It's time for our new challenge...the wonderful bloggers from the ABC Challenge are now participating in, drumroll please, the Mish Mash Challenge!!!
I Used:
Sinful Colors- Tempest (lavender crème)
Cover Girl- 300 (purple crème)
Loreal- Breaking Curfew (dark purple crelly)
Scotch Tape
It's purple!!! So this was a fun and easy mani. After you paint your base colors (ring finger is Loreal Breaking Curfew and Thumb is Cover Girl 300), and it has dried completely, add scotch tape diagonally on your nail:
Please tell me I'm not the only blogger with nail polish on their laptop! And it's only 7 months old :(
When that has dried completely, add the tape in the other direction and paint that triangle. I really like how this turned out and can see doing it with a ton of different color combinations.
Be sure to check out the wonderful ladies below and see their purple designs!! Plus we have a couple of new members so get to know them! Hope y'all have a fabulous day!! Happy Polishing!!
(click to enlarge)
And first up is my absolute favorite color in the world, PURPLE!!!I Used:
Sinful Colors- Tempest (lavender crème)
Cover Girl- 300 (purple crème)
Loreal- Breaking Curfew (dark purple crelly)
Scotch Tape
It's purple!!! So this was a fun and easy mani. After you paint your base colors (ring finger is Loreal Breaking Curfew and Thumb is Cover Girl 300), and it has dried completely, add scotch tape diagonally on your nail:
Please tell me I'm not the only blogger with nail polish on their laptop! And it's only 7 months old :(
When that has dried completely, add the tape in the other direction and paint that triangle. I really like how this turned out and can see doing it with a ton of different color combinations.
Be sure to check out the wonderful ladies below and see their purple designs!! Plus we have a couple of new members so get to know them! Hope y'all have a fabulous day!! Happy Polishing!!
Friday, June 7, 2013
Pink & Purple Dry Marble French Tips
Happy Friday Y'all!!! How excited are you for the weekend? My weekend is looking quiet, but today is going to be super busy. Have to get the now-a-teenager to her dance class (she's had 5 straight days of pointe for 4 hours a day!) and then she has a demonstration at the end. Then she's off to a friend's house for a sleep-over and the hubby and I are actually having a date night!! It has been so long that I don't even remember the last time this happened!! So what's on my nails? This:
I Used:
Sation- Of Corset I'll Call You (pink crème)
Rimmel Cocktail Colour- Baby Bellini (shimmery purple)
Fine Detail Brush (see below)
So this was my attempt at a dry marble. For some reason this technique seems to elude me. I just don't get it. To me it looks like I did flame French tips! But that's ok, that works for me too!!
To start this mani I painted one coats of Sation Of Corset I'll Call You, a soft pink crème. For the second coat, I paint only one nail at a time, and I paint it with a pretty thick coat. Then I immediately brush a stripe of Rimmel Cocktail Colour Baby Bellini a shimmery purple.
Then I used a very fine brush to make the "marble" effect. NOTE: You don't need a brush for this, just use a straight pin or a toothpick. Then I dragged the brush through the two polishes and this is what I ended up with:
Even though it didn't turn out like I meant for it to, I like it. I am going to have to keep trying the dry marble technique, lol. I hope you have a fabulous Friday!! Happy Polishing!!
I Used:
Sation- Of Corset I'll Call You (pink crème)
Rimmel Cocktail Colour- Baby Bellini (shimmery purple)
Fine Detail Brush (see below)
So this was my attempt at a dry marble. For some reason this technique seems to elude me. I just don't get it. To me it looks like I did flame French tips! But that's ok, that works for me too!!
To start this mani I painted one coats of Sation Of Corset I'll Call You, a soft pink crème. For the second coat, I paint only one nail at a time, and I paint it with a pretty thick coat. Then I immediately brush a stripe of Rimmel Cocktail Colour Baby Bellini a shimmery purple.
Then I used a very fine brush to make the "marble" effect. NOTE: You don't need a brush for this, just use a straight pin or a toothpick. Then I dragged the brush through the two polishes and this is what I ended up with:
Even though it didn't turn out like I meant for it to, I like it. I am going to have to keep trying the dry marble technique, lol. I hope you have a fabulous Friday!! Happy Polishing!!
Monday, May 20, 2013
Sparkly Chevron Mani & Pedi
Hi Everyone!! I have a big post for you today (and it's picture heavy) so I'm going to get right to it!! Saturday was the now-a-teenager's dance recital. I was so excited! It was the first time to see her dance en pointe and, because we were sick the entire month of March, the first time I saw her in her costumes. So I went out and I bought this fabulous dress to wear:
And I wanted my fingers and toes to match! So here is the mani and pedi I came up with:
I Used:
Nina Ultra Pro- French Crème
Sinful Colors- Black on Black
Crystazzi Rhinestones
Scotch Tape
First I want to tell you these pictures were just taken today (Monday afternoon) and I did the mani/pedi on Friday, so it wore really well. (See, my method of placing rhinestones works, ha ha). And second, I got a ton of compliments on them. Yes, them. People even noticed my toes!
To do these, I started by painting all my fingers and toes with two coats of Nina Ultra Pro French Crème. Once that had dried completely, I used scotch tape to tape off the ends of my fingers and toes, forming a V shaped French tip. Then I painted the V shape with Sinful Colors Black on Black. For my big toes, I did the above, and then cut a V shape out of the scotch tape to make the Chevron shape. And repeated the process for my accent fingers. This will work great for short nails too. Either make the white tips smaller or more of a v shape like I did my toes.
To place the crystal rhinestones, I just put a generous drop of top coat where I wanted the rhinestone to go, then dropped the stone there. I love this method of placing rhinestones because it allows all of the sparkle to show and still holds them in place securely.
I LOVE how these turned out. I hate to take them off! I think I'll keep the pedi for a while... I hope you like my Sparkly Chevrons. See you tomorrow! Happy Polishing!!
And I wanted my fingers and toes to match! So here is the mani and pedi I came up with:
I Used:
Nina Ultra Pro- French Crème
Sinful Colors- Black on Black
Crystazzi Rhinestones
Scotch Tape
First I want to tell you these pictures were just taken today (Monday afternoon) and I did the mani/pedi on Friday, so it wore really well. (See, my method of placing rhinestones works, ha ha). And second, I got a ton of compliments on them. Yes, them. People even noticed my toes!
To do these, I started by painting all my fingers and toes with two coats of Nina Ultra Pro French Crème. Once that had dried completely, I used scotch tape to tape off the ends of my fingers and toes, forming a V shaped French tip. Then I painted the V shape with Sinful Colors Black on Black. For my big toes, I did the above, and then cut a V shape out of the scotch tape to make the Chevron shape. And repeated the process for my accent fingers. This will work great for short nails too. Either make the white tips smaller or more of a v shape like I did my toes.
To place the crystal rhinestones, I just put a generous drop of top coat where I wanted the rhinestone to go, then dropped the stone there. I love this method of placing rhinestones because it allows all of the sparkle to show and still holds them in place securely.
I LOVE how these turned out. I hate to take them off! I think I'll keep the pedi for a while... I hope you like my Sparkly Chevrons. See you tomorrow! Happy Polishing!!
Monday, May 6, 2013
Black & Silver French Tips
Happy Monday Everyone!! How is your day going? I'm actually happy it's Monday! The now-a-teenager and I have the day off after a very long seven days. The ballet was wonderful and if I say so myself, she was the best raccoon ever! But now I'm absolutely exhausted! And I guess she is too since she didn't wake up until 11:45!! So today's post is be kind of short because as soon as she woke up, it was nap time for me!
These are the nails I wore to the actual ballet. I had bought a gorgeous black and white chevron dress to wear, but the weather didn't cooperate (it was 59 and constantly raining), so these were designed to match that dress:
I Used:
Sinful Colors- Black on Black (black crème)
Milani- HD (silver scatter holographic)
NYC- Matte Me Crazy (matte top coat)
I thought these were fun and they were easy to do. I started with two coats of black polish (Sinful Colors Black on Black) and topped it with NYC Matte Me Crazy. I love that top coat. Instead of having to buy a bunch of matte polishes, this makes any polish matte. Then just using the brush that came with the polish I painted Milani HD on the corners of my nails. But you can use scotch tape to do this too. In fact, I ended up having to do my nails in an extremely short amount of time, so when I do this again I will probably use the tape.
Here is a picture from in the theater. It's really dark, I know, but it shows the holo:
I hope y'all enjoyed this! I'm off to drag the kid out of bed so I can go back to sleep, ha ha. Happy Polishing!!
These are the nails I wore to the actual ballet. I had bought a gorgeous black and white chevron dress to wear, but the weather didn't cooperate (it was 59 and constantly raining), so these were designed to match that dress:
I Used:
Sinful Colors- Black on Black (black crème)
Milani- HD (silver scatter holographic)
NYC- Matte Me Crazy (matte top coat)
I thought these were fun and they were easy to do. I started with two coats of black polish (Sinful Colors Black on Black) and topped it with NYC Matte Me Crazy. I love that top coat. Instead of having to buy a bunch of matte polishes, this makes any polish matte. Then just using the brush that came with the polish I painted Milani HD on the corners of my nails. But you can use scotch tape to do this too. In fact, I ended up having to do my nails in an extremely short amount of time, so when I do this again I will probably use the tape.
Here is a picture from in the theater. It's really dark, I know, but it shows the holo:
I hope y'all enjoyed this! I'm off to drag the kid out of bed so I can go back to sleep, ha ha. Happy Polishing!!
Subscribe to:
Posts (Atom)

-1.jpg)


.jpg)


.jpg)