Showing posts with label lines. Show all posts

Wednesday, May 29, 2013

ABC Challenge: U is for Urban Waves

**Some products in this post were provided to me for review.  The opinions are my own and were not influenced in any way**

Hello Lovelies!!!  I'm sorry this is so late.  I swear I've been bitten by a tse tse fly!! You know that fly that makes you sleep all the time?  I can't keep my eyes open today!!  Of course it could be the fact that I'm an insomniac.  Oh well.  I do have today's nails for you.  Today is U of the ABC Challenge and I have Urban Waves (or Undulating Urban for the double u's):
I Used:
China Glaze- Urban-Night
Piggy Polish- Teal The End of Time
Born Pretty Acrylic Rhinestones
Medium Liner Brush

I love this mani.  And I really love these two colors together!  It's simple, but there's shimmer, rhinestones and purple (ok, plum but it's all purple to me), all my favorite things!  And it's a pretty easy mani as long as you use my little trick.

I started with two coats of China Glaze Urban Night, a beautiful, dark, smokey plum/purple crème.  Next came the Piggy Polish Teal the End of Time, a shimmery teal polish with a gold duochrome.  Once that was dried, I placed three dots on my nails to guide my wave:  One in the middle, and one to the left of that by the cuticle and one to the right at the tip.  These are my starting and ending spots:
Sorry, it's a little hard to see, but it gives you the idea.  I then started at the center spot and, using a medium liner brush to draw the waves.  Don't worry if the center dot shows, you're going to cover it with a rhinestone.

Once the wave has dried, I applied the top coat.  Then using the top coat, I placed a dot of top coat where I wanted the rhinestone and then sunk the rhinestone in.  I loved the rhinestones!  They  are from the Born Pretty Store (click here to see the rhinestones!!  I will have a full review of them coming soon!)  These are such beautiful rhinestones!!!  They are unusual colors:  teals, purples, neons, all with an aurora borealis finish!!  And all at a fabulous price!! these were sent to me for a review and I will have a full review of them next week.  Once you've placed the rhinestones,  you're done! 
Be sure to check out all the other fabulous "U" manicures done by this incredible group of talented ladies!!!  Happy Polishing!!!

Friday, May 3, 2013

Neon Art Deco French Tips

Hi Lovelies!!!  Here is my second post of the day!  I'm on a roll this week :)

This is a Neon Art Deco design:
I Used:.
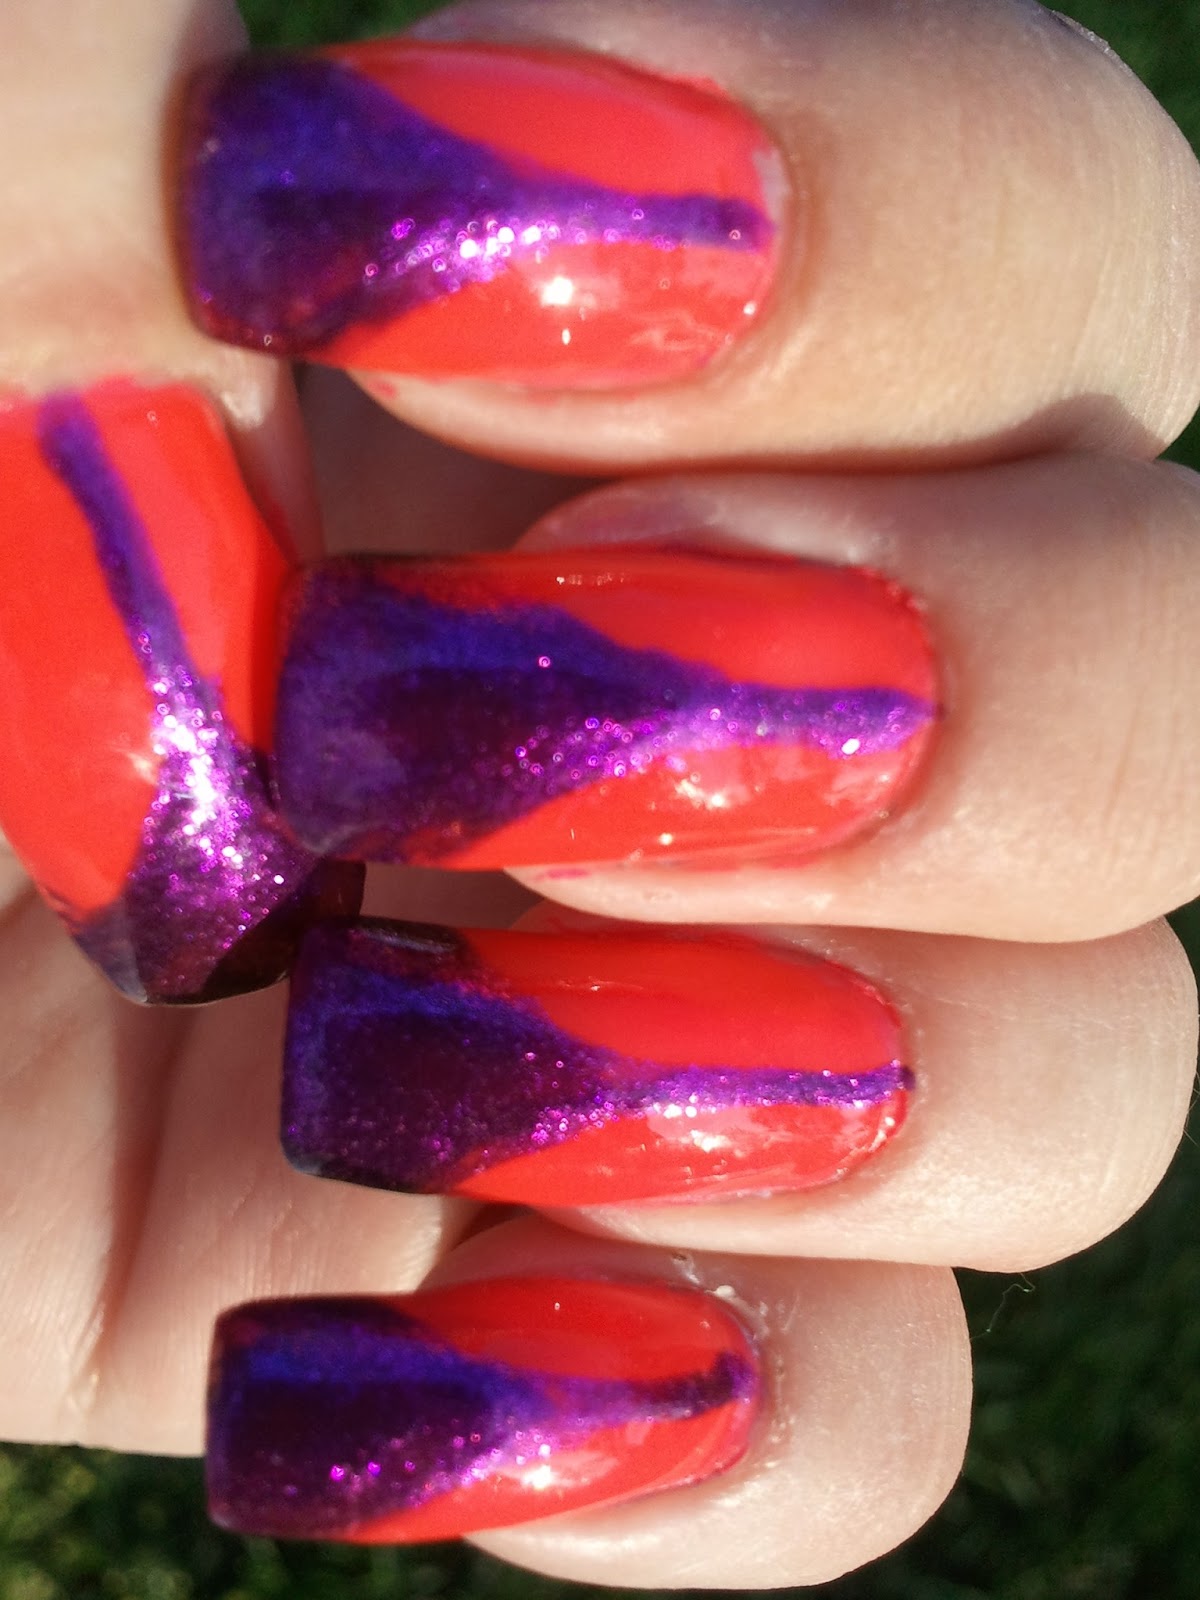
Orly- Hot Shot (neon pink that leans towards a salmon color)
Hard Candy- Pee Wee Purple (super shimmery purple)
Liner Brush

I started with two coats of Orly Hot Shot.  The above picture, taken outside, is a pretty accurate depiction of the color, a bright, neon pink that looks like it has a little bit of salmon in it.  Once that was dried I applied a top coat.  I always apply a top coat over my base color when doing nail art.  That way if I make a mistake, I can use a small brush and 100% acetone to clean it up without removing any of the base color.
Then using a really thin brush or liner brush, I painted on the Hard Candy Pee Wee Purple.  I started at the cuticle and drew a straight (ish) line to the tip of my nail.  Then using the same brush, I started at the line in the middle of the nail and painted outwards toward the tip.  The line ended at a little above the nail line.  To help with drawing the line, make a small dot using the polish so you know where you want the line to end and can make both sides even.
Lastly, add a top coat to protect the design.  Hope y'all have enjoyed a different take on French nails.  Y'all have a fabulous Friday and Happy Polishing!!


Wednesday, February 27, 2013

ABC Challenge: H is for Harvest Moon & Hand Drawn

Hi y'all!!  I hope you are having a fabulous day.  We are having a weird Wednesday here in North Georgia...there is some bright, yellow thing glowing in the sky, lol.  We have had so much rain that the sun has been really rare this winter.

Anyway, on to the challenge!  This week is H and I have China Glaze Harvest Moon and some Hand drawn wisps for you.
I Used:
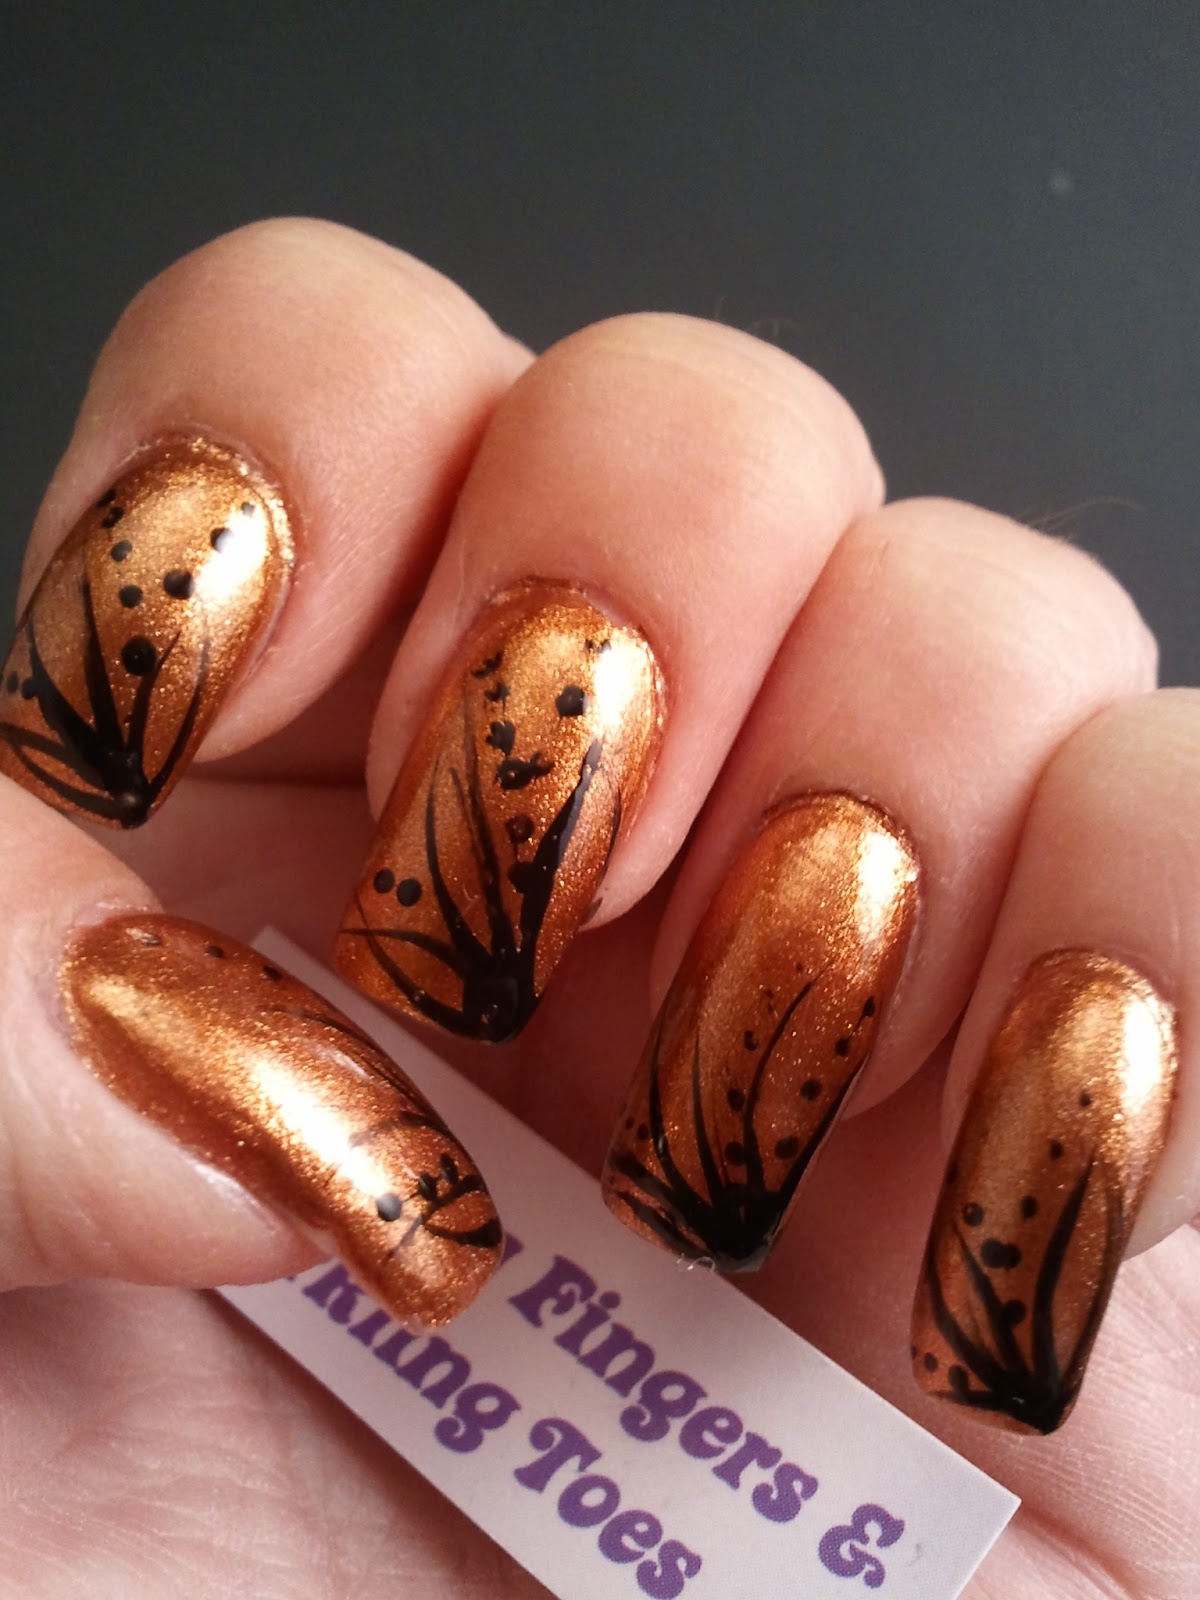
China Glaze- Harvest Moon (super shimmery copper)
Sinful Colors- Black on Black (black crème)
Liner Brush
Dotting Tool

I started with two coats of China Glaze Harvest Moon. I'm not sure what collection this is from since I bought it on clearance at Ulta, and I really don't know how I missed it!  This is a gorgeous, super shimmery copper that is just incredible. The above picture was taken out in the sun.  Don't you just love it??

Then I just drew random lines and dots with the Sinful Colors Black on Black.  I tried to make the lines similar, but not identical.  I'm not sure why, I just kept looking at each nail individually, lol.  But they are close enough that I think they match.  You could do them the same of course :)

I hope you like this week's challenge.  Join me in checking out the other lovely ladies' designs!  Happy Polishing!!


Monday, February 11, 2013

Inspired by a Tutorial, R31DC

Hi y'all!  How's your Monday going?  I'm not a huge fan of Mondays (but then who is), and a Monday that is rainy and cold leaves me comatose.  Which unfortunately is the type of Monday we have here in Georgia today.  All I want to do is crawl back into bed and wait for Tuesday.  But I can't.  Sigh.

Anyway, today is the second to last day of the Relaxed 31 Day Challenge (another reason to be sad on this dreary day), and today's prompt is Inspired by a tutorial.  For this challenge I picked the chevron nail tutorial from Dressed Up Nails .  And here is my interpretation:

I Used (from lightest to darkest):
essence- grey-t to be here (grey with a purple shimmer)
Sally Hansen- Lacey Lilac (lilac cream)
Wet-n-Wild- On a Trip (purple crème)
Ulta- Celebutante (dark purple crème)
Orly- Wild Wisteria (very dark purple crème)
Small Liner Brush

I do love this look, but it was really time consuming and not great for a perfectionist.  I drew the chevrons free hand and the other nails are two coats of Ulta Celebutante.  One thing I would change is to paint a thin line of the lightest color down the middle of the nail to keep my center straight.  I will definitely be trying this again!

Be sure to check out the other wonderful ladies!  I hope y'all have a fabulous (and dry) Monday and Happy Polishing!!


Wednesday, January 16, 2013

Double Challenge: Stripes & B

Hi Everyone!!  How are y'all doing today?  Everything is going pretty good here.  My almost teenager went up on pointe last night and she is so excited!  Well, she really can't wait until she can wear them away from the barre, but she still enjoyed it. 

As for me, I have TWO challenges for you today!  Of course there is the Relaxed  31 Day Challenge, which is Stripes today, and my new challenge by Kimber at Kimber's Lacquer Korner , the ABC Challenge!  Every Wednesday for 26 weeks, our mani has to have something to do with that week's letter.  This week is the letter B.  So for today I have Blue Stripes:  (there is one more b)
I Used:
Orly- Snowcone (light blue crème)
Ulta- Blues Cruise (blue jelly with dark blue glitter)
Long Liner Brush

I started this with two coats of Orly Snowcone and then with the long liner brush, I painted the stripes in a random pattern by free hand.  I like how this turned out, but if I was to do it again, I would use a one coat polish for the stripes.  Since I used a jelly with glitter, I had to go over the lines like 3 to 4 times and that made the lines less crisp.  That's the only thing I didn't like.
Right Hand
Left Hand
I'm so excited to be in these two challenges!!  And if anyone can help me figure out what to do for the Q, U and X weeks, I'll be your very best friend!!!!  Be sure to check out all the participants of both the Relaxed 31 Day Challenge and the ABC Challenge!  This is an extremely creative bunch!  And, as always, Happy Polishing!!


Wednesday, November 14, 2012

Half Moon Tutorial

Hi Everybody!!  I decided to go with a more classic look today, well classic for me.  The half moon design has been popular for a long time.  It originated in the 20's and was the height of fashion in the 40's.  I remember my grandmother wearing her nails like this all the time. (She was so ahead of her time, she always painted the back of her nails, and she knew the secret to white iodine and your nails.)  So I have the steps for the classic half moon, but you know I had to change it up some. (The classic look-half moon color first- is nude and white, black and white or red and black.)  This is a very easy manicure, you just need to know the trick.

I Used:
China Glaze- No Plain Jane (purple/beige duochrome)
Icing- Golden Age of Glitter (gold and black glitter)
Diamond Cosmetics- Black Glitter
Pure Ice- Jaguar (gold)

So here's the finished manicure:


I started by painting two coats of China Glaze No Plain Jane.  This is such a pretty frosted purple with a slight beige shift.  This base color will be the color of your half moons.

Make sure that has dried completely, then grab your secret weapon: hole reinforcements!  Yes, those things you used in school are what you need to make this manicure perfect.  Place them down by your cuticles like in this picture:

Make sure they are down firmly so the polish doesn't leak underneath them.

Then I painted my nails with two coats of Icing Golden Age of Glitter, a gorgeous gold and black glitter in a clear base.  Because I painted two coats of Icing, I kept the hole reinforcements on until I painted the second coat.  Remove them immediately after the second coat.

To really show the half moons, I added black and gold lines.  Start with black and using a liner brush or very thin brush, follow the line made by the half moons.  Then follow the black line with the gold.  I used Pure Ice Jaguar.  It's the perfect gold and matched the glitter perfectly.  Don't forget the top coat!

So what combination are you going to use?  Let me know!  Happy Polishing!!

Wednesday, October 31, 2012

Attack of the Killer Tomatoes (Halloween Design)

Happy Halloween Everybody!!  I hope you are having a spook-tacular day!  I wanted to get one last Halloween nail art design in before it's all over, I was just having a hard time deciding what to do.  Then my daughter wanted to watch a marathon of "Attack of the Killer Tomatoes" movies.  She had never seen them before and since she loves horribly bad movies, and it is Halloween, I said ok.  Hence the idea for my newest design...Attack of the Killer Tomatoes!!!

I Used:
Wet-n-Wild Fantasy Makers- Nail in the Coffin (glittery black)
China Glaze- White on White
LA Colors- BCC 660 (dark red)
LA Colors- Palm Tree (green)
China Glaze- Liquid Leather (black)
2- smallest dotting tools (click here for tips on alternative dotting tools and brushes)
Liner Brush

So here is the finished design:
I love how they turned out.  And here's how I did it:

Start with two coats of Nail in the Coffin.  I did put a thin coat of top coat to give me a smooth surface to work on.  Even though the glitter is extremely subtle, it is there and made a bumpy work surface.


Then, so the color would show, I painted white tomato shapes.  I used a small brush to do this, but the brush that came with the polish would have worked much better and given a more even finish.  Remember, tomatoes are far from round, so don't worry about them having to be perfect.  In fact, they shouldn't be perfect.


Next, cover the white with red polish.  I had to use two coats to make the tomatoes look even since the white wasn't.  Using a dotting tool, make the eyes by placing the dot and moving it just slightly, like you're drawing a very short line.  Then using a smaller dotting tool, make the pupils.  I used a liner brush (just a very thin, long brush) to make the mouths.  I just drew a line.  Using the same brush make very short lines for the fangs.  For the stems, I put a couple of drops of the green polish and the white polish on my plate (or sheet of paper works perfectly too) and dipped my brush into both colors to paint the stems.  They didn't show up using just the green.  The last step was the top coat.

I hope y'all enjoy my spooky, killer design and I hope everyone has a safe and fun Halloween!!  Happy Polishing!!

Monday, October 29, 2012

Pink & White Abstract

Hi Everybody!  Hope y'all had a fabulous weekend!  Mine was full of young teen girls and sleepovers.  Although my child pretty much went two days without actually sleeping. LOL. 

I wanted to post a new manicure for y'all today, but I love my Halloween water marble so much, I can't force myself to take it off yet.  So instead I have an older manicure for you and it works great for Breast Cancer Awareness.  I've been holding on to this one trying to find the wonderful blogger that first came up with this design.  When my computer crashed, I lost all of my web sites, sadly including this one.  So if any of y'all know who did this design, let me know in the comments so I can post a link to her site. I can't quite remember it, but I this is close to an exact copy.  I promise this is an easy manicure and it gets TONS of compliments!  I did use a nail art brush and dotting tools, but I have tips for easy alternatives, just click here.

I Used:
Orly- White Tops
Orly- Preamp
Zoya- Charisma
Orly- Basket Case
China Glaze- Purple Panic
Nail Art by Diamond Cosmetics- Black
Sinful Colors Nail Art- Bad Chick


Start with two coats of Orly White Tops or whatever white polish you have.  Once that has completely dried, choose your first color.  I started with Orly preamp.  Put only a small amount of polish on your brush (can be the brush that came with the polish), and starting at the right top corner of your nail, brush down toward your cuticle lifting the brush before you reach your cuticle.  You want to leave a jagged edge with some of the white showing.

Then repeat with the next three colors making each color a different length.  Once that has completely dried, paint a line with the black polish from the bottom left corner of your nail, diagonally towards the top of your nail lifting as you go.  Make sure to stop before reaching the tip of your nail.  Then draw a white line from the opposite side.

With a dotting tool (see link above for what to use as a dotter) make dotes along the lines with the matching color.

One of the great things about this design is that every nail should be different...you can't make a mistake!  I can think of a multiple of colors to do this in too.  I will be doing this one again!

And again, if y'all know who's design this is PLEASE let me know in the comments.  I want to give her all the credit!

And for everyone in the path of Sandy, my thoughts are with you.  Stay safe!


Monday, October 1, 2012

Tribal

Ok y'all, I need your help.  This is my version of the tribal nail design and I'm not sure what I think of it.  I love the colors. Turned Up Turquoise is one of my all time favorite polishes (I'm even on my 3rd bottle of it).  I also like the brown and the gold.  I like the different parts, just not sure if I like it all together.

I used:
China Glaze- Turned Up Turquoise
China Glaze- Liquid Leather (black)
China Glaze- Desert Sun (brown)
China Glaze- White on White
Pure Ice- Jaguar (gold)
Long and Medium Liner Brushes

Leave me a comment and let me know what y'all think.  Happy Polishing!!

Saturday, September 29, 2012

Purple Art Glass

Hi Everyone!! I hope y'all are having a wonderful weekend.  We are having a nice, quiet weekend at home.  But I do have a new design for you, and can I just say I am in love!!!  I was in an antique store the other day and fell in love with this art glass vase.  It was purple and sparkled!! What was there not to love?  Other than the price that is.  So since I can't buy the vase, at least I can wear the design on my nails! 

I Used:
Orly- Decoded (gray)
Wet-n-Wild- Buffy the Violet Slayer
NYC- Lavender Cupcake
Rimmel- Wild Orchid
Orly- Charged Up
Orly- Ingenue

I started with two coats of Orly's Decoded, a pretty dark gray from their Electronica collection.  When that was dry, I used a medium (about 1/2 inch) stripping brush (see my tip on brushes) for the stripes.  Just make random stripes of different lengths and widths along your nails.  Make sure you don't completely cover your base color.  If you don't want to use purple but still get the same effect, you need to use a combination of creme, shimmer and glitter polishes.  This will give your design depth and make it look more like glass.  There are endless combinations.  (They had the same vase if multiple colors!)  Don't forget your top coat.  I used two coats to help give this design a smooth, glassy appearance.

I hope y'all have fun with this design.  I would love to see some of your interpretations!   Post them in the comments below.  Happy Polishing!!

P.S.  The glitter polish is Orly's Ingenue.  It's an unbelievable color!  Purple duochrome with an extreme gold shift.  Love it!!

Left Hand:


Right Hand: