Showing posts with label rhinestones. Show all posts

Thursday, May 29, 2014

Neon Studded Half Moon

Hey Y'all!!  Happy Friday!!  Thank goodness!  Although I have a busy weekend planned.  I have to get the girl child some new pointe shoes, which for us is an all day event.  The nearest place is over 65 miles away and I have to drive through a super busy metropolitan city.  And then come home and clean house because I'll have a house full of teenage girls for most of next week.  Although when they are all here, I just hide in my bedroom and read and paint my nails.  For anyone who has young children, when they reach teenage years, if you throw enough food and soda at them, they pretty much leave you alone, lol!

Anyway, for today I have a simple Neon Studded Half Moon mani for you:
I Used:
Salon Perfect- Flamingo Flair (neon peach crème)
Sally Hansen- I Love Nail Art Studs (black studs)
I started with two coats of Salon Perfect Flamingo Flair,a gorgeous peach neon crème.  The formula was a little streaky, but evened out after just two coats.  I loved the color!  So fresh and bright, I think this works great for Spring and Summer!

Once your base coat has dried, start adding top coat, working with only one nail at a time.  While the top coat is still wet, place your studs (that sounds naughty, but it's not.  Really, I mean it).  You can place them in a semi-circle or choose to do a more geometric shape like I did here.
I hope y'all enjoyed today's mani and that y'all have a fabulous weekend!  Do you have any plans?

Happy Polishing!!

Thursday, May 1, 2014

Spring / Summer Pedicure

Hey Y'all!!  Well, at least today started off better than yesterday!  If you follow me on Instagram or Facebook, you know we had a tree come down and with it, a power line that landed on my van.  Thankfully we are all ok, and everything is cleaned up.

For today, I have one of the pedicures used in the Atlanta Parents article:
I Used:
Orly- Flawless Flush (soft lilac with silver shimmer)
Finger Paints- First Edition (dark purple neon)
Pink and Yellow Rhinestones
Make Up Sponge

To start this pedicure, I used two coats of Orly Flawless Flush. Once that was dry, I took a make up sponge, and after cutting it down and wetting it, I painted very thin stripes of Orly Flawless Flush and Finger Paints First Edition, cause, you know, toe nails are little.  Then just dab on.  It took two coats  Top coat is next.  When applying the top coat to the big toe, sink the rhinestones down into the top coat.  I used five pink rhinestones and one yellow to make the flower.
I hope y'all enjoy today's design.  I now have to rush and get the teen ready for dress rehearsal!  Have a fabulous day and Happy Polishing!!

Tuesday, April 29, 2014

Spring or Summer Daisy Pedicure

Hey Y'all!!  So as promised, I would give you the tutorials for the designs used in the May issue of Atlanta Parent.  I did three designs for the article, so here's tutorial number 1.  This was my favorite design, but they didn't use it.  Oh well.  These daisies will be perfect for Spring and Summer!
I Used:
Wet-n-Wild- Cursed (orange jelly)
Wet-n-Wild- Get Lucky (yellow crème)
Finger Paints- First Edition (dark neon purple)
White Rhinestones
Medium Dotting Tool (toothpick would be perfect here)

This is a quick and easy pedicure.  I started with three coats of Wet-n-Wild Cursed.    Drop a couple of drops of your polish(es) on a piece of paper to dip your dotting tool into.  Next I started making the flowers with a medium sized dotting tool.  Start with a small dot to show the center of your flower.  Then make five slightly larger dots around that dot.  A toothpick would work perfectly for this.  Be sure to leave a little space between your center dot and your petals for the rhinestone.
Next, apply your top coat.  Make sure to make it a pretty thick coat, and do only one nail at a time.  Before it dries (or move on to the next nail), drop your rhinestone in the middle of your flowers.  Then press them down very easily.  This will set the rhinestone down into the top coat and give you a very secure stone.  I wore this design for a long time without losing a stone.

Hope y'all enjoyed today's pedicure!!  Two more to go!  Happy Polishing!!

Wednesday, December 4, 2013

Nail Polish Canada Contest, Week 2: DECORATIONS

Hey Y'all!!  It's Week 2 of Nail Polish Canada's Contest and this week's theme is DECORATIONS!!  After a lot of thinking, seriously, a lot, I came up with a decorated tree for my entry:
For the Water Marble, I Used:
China Glaze- Def Defying (lime crème)
China Glaze- Exotic Encounters (medium green crème)
Ulta- Envy (foil finished dark green)
BornPrettyStore- Holographic 12 (dark green linear holographic)

For the Decorations, I Used:
Orly- Rococo A-Go-Go (purple foil polish with gold shimmer)
Zoya- Dream (dark blue with scatter holographic glitter)
White rhinestones

Shameless plug:  PLEASE HELP ME BY CLICKING HERE TO VOTE!!!!  PRETTY, PRETTY PLEASE<3 <3
If y'all like this design, I have a big favor to ask, please go vote for it by simply CLICKING HERE!!!  Thank you so much!!!  I really appreciate it!!
Happy Polishing!!

Wednesday, September 4, 2013

Mish Mash Challenge: Hot!

Hey Y'all!!  Happy Hump Day!!  Since I'm a little behind, I'm going to get straight to the post.  Since it's Wednesday, that means it's time for the Mish Mash Challenge!  And today's theme is HOT! 

So I know YOU know the obvious choice, it's the same thing I think of when I hear the word hot, ME!!!!  I mean, what else can it be???  So today's nails should be 10 images of me!  But narrowing down to just 10 proved to be too hard!  LMBO!!!!!!  Just kidding ;)

Ok, my first thought when I saw this theme was pictures of Johnny Depp!!!  But, sadly, my printer was completely out of ink so no pictures, no Johnny mani.  I think I might cry!  I WILL be doing this mani at a future date!  In the meantime, this is what I came up with at the last minute:
A reciprocal rhinestone gradient!!!

I Used:
Julep- Abbie (bright yellow crème)
Julep- Natasha (bright orange crème)
Orly- Unlawful (bright red crème)
Orly- Smolder (dark red shimmer)
Make Up Sponges
Crystazzi Crystal Rhinestones (in four shades from yellow to dark orange)
 

Ok, not as great as pictures of me (lol) or Johnny...or better yet, pictures of me with Johnny Depp, but I still really like it.  I love gradients and love rhinestones!
I can't wait to see what the other ladies came up with...think they will have manis of me???  LOL

Be sure to check out their fabulous manis in the links below!!  Happy Polishing!!!


Friday, June 14, 2013

Review: Born Pretty Glitter Rhinestones

The following products were furnished to Glittery Fingers & Sparkling Toes for review.  The opinions expressed are my own and were in not influenced in any way.

TGIF Everybody!!! I am so excited!!  I have to get straight to the review because, spoiler alert, I LOVE these rhinestones!!!  As soon as I saw them on the  Born Pretty website, I knew I had to have them!!  Born Pretty has named these Glitter Rhinestones, but they are so much more!  Here is what you receive:
The colors are, starting with the silver (right below the white spacer):
Metallic Silver
Neon Pink
Medium Orange
Brown
Turquoise
Neon Orange
Cream
Yellow
Purple
Dark Orange
Teal
Green

All the rhinestones, except the silver, have an aurora borealis finish that makes these glitter in a dark room!  The colors are beautiful enough on their own, but they added that AB sparkle, and they are GORGEOUS!!  I am so excited to show you these.  Here are just a few designs using just a few of the colors on the wheel (but trust me, you are going to see these a lot).  Pictures show the rhinestones in a light box and outside in direct light.
Silver outside

Silver in lightbox

Rhinestones in above pictures: Yellow, Orange, Turquoise, Green, Dark Orange and Purple

Cream rhinestones

Teal rhinestones

Aren't these gorgeous????  It took me a while to do this review because I wanted to make sure I showed you as many as possible.  These made my nails glitter like you wouldn't believe! And they never failed to get a ton of compliments!!!

To place these, just put a drop of clear or top coat where you want the rhinestone to go, then sink the rhinestone in to the polish.  This way you still get long wear (all of these pictures were taken at least 24 hours after I did the mani), but you still get to enjoy all the sparkle!!

They are $4.47 a wheel AND with my discount code NE5J61 you get 10% OFF!!!  And they have free shipping everywhere in the world!!!

And while you're on their site, be sure to look around.  They have EVERYTHING!!!!  Not just nail supplies (literally everything you could possibly want for your nails and nail art), but even jewelry, and decorating items (like items to decorate your bathroom)!!!!  They really are fabulous!!

I hope you enjoyed today's post!!  Happy Polishing!!!


Wednesday, May 29, 2013

ABC Challenge: U is for Urban Waves

**Some products in this post were provided to me for review.  The opinions are my own and were not influenced in any way**

Hello Lovelies!!!  I'm sorry this is so late.  I swear I've been bitten by a tse tse fly!! You know that fly that makes you sleep all the time?  I can't keep my eyes open today!!  Of course it could be the fact that I'm an insomniac.  Oh well.  I do have today's nails for you.  Today is U of the ABC Challenge and I have Urban Waves (or Undulating Urban for the double u's):
I Used:
China Glaze- Urban-Night
Piggy Polish- Teal The End of Time
Born Pretty Acrylic Rhinestones
Medium Liner Brush

I love this mani.  And I really love these two colors together!  It's simple, but there's shimmer, rhinestones and purple (ok, plum but it's all purple to me), all my favorite things!  And it's a pretty easy mani as long as you use my little trick.

I started with two coats of China Glaze Urban Night, a beautiful, dark, smokey plum/purple crème.  Next came the Piggy Polish Teal the End of Time, a shimmery teal polish with a gold duochrome.  Once that was dried, I placed three dots on my nails to guide my wave:  One in the middle, and one to the left of that by the cuticle and one to the right at the tip.  These are my starting and ending spots:
Sorry, it's a little hard to see, but it gives you the idea.  I then started at the center spot and, using a medium liner brush to draw the waves.  Don't worry if the center dot shows, you're going to cover it with a rhinestone.

Once the wave has dried, I applied the top coat.  Then using the top coat, I placed a dot of top coat where I wanted the rhinestone and then sunk the rhinestone in.  I loved the rhinestones!  They  are from the Born Pretty Store (click here to see the rhinestones!!  I will have a full review of them coming soon!)  These are such beautiful rhinestones!!!  They are unusual colors:  teals, purples, neons, all with an aurora borealis finish!!  And all at a fabulous price!! these were sent to me for a review and I will have a full review of them next week.  Once you've placed the rhinestones,  you're done! 
Be sure to check out all the other fabulous "U" manicures done by this incredible group of talented ladies!!!  Happy Polishing!!!

Monday, May 20, 2013

Sparkly Chevron Mani & Pedi

Hi Everyone!!  I have a big post for you today (and it's picture heavy) so I'm going to get right to it!!  Saturday was the now-a-teenager's dance recital.  I was so excited!  It was the first time to see her dance en pointe and, because we were sick the entire month of March, the first time I saw her in her costumes.  So I went out and I bought this fabulous dress to wear:
And I wanted my fingers and toes to match!  So here is the mani and pedi I came up with:
I Used:
Nina Ultra Pro- French Crème
Sinful Colors- Black on Black
Crystazzi Rhinestones
Scotch Tape

First I want to tell you these pictures were just taken today (Monday afternoon) and I did the mani/pedi on Friday, so it wore really well.  (See, my method of placing rhinestones works, ha ha).  And second, I got a ton of compliments on them.  Yes, them.  People even noticed my toes!

To do these, I started by painting all my fingers and toes with two coats of Nina Ultra Pro French Crème.  Once that had dried completely, I used scotch tape to tape off the ends of my fingers and toes, forming a V shaped French tip.  Then I painted the V shape with Sinful Colors Black on Black.  For my big toes, I did the above, and then cut a V shape out of the scotch tape to make the Chevron shape.  And repeated the process for my accent fingers.  This will work great for short nails too.  Either make the white tips smaller or more of a v shape like I did my toes.

To place the crystal rhinestones, I just put a generous drop of top coat where I wanted the rhinestone to go, then dropped the stone there.  I love this method of placing rhinestones because it allows all of the sparkle to show and still holds them in place securely.

I LOVE how these turned out.  I hate to take them off!  I think I'll keep the pedi for a while...  I hope you like my Sparkly Chevrons.  See you tomorrow!  Happy Polishing!!


Tuesday, May 14, 2013

Simple Scroll

Hi y'all!!  See?  I told you I had a post for you today!  But I have to hurry, the now-a-teenager has dance soon.  So I wanted to try one of my new polishes, but it was so hard to decide!!  I finally chose one that I had seen in the Ulta catalog, OPI Significant Other Color, and a simple design to go with it:
I Used:
OPI- Significant Other Color
OPI- Purple With A Purpose
Acrylic Rhinestones (light green and purple)
Fine Liner Brush

I love this polish!!!!  OPI Significant Other Color is a pale lilac duochrome polish that shifts between a light pink and green!!  And the shift is incredibly obvious in person.  I'm so upset that I couldn't get a good photo of the shift.  But see that green rhinestone?  That is the shade of green in the duochrome.  The polish is fabulous!  The formula was perfect.  The pictures show three coats, but two would have been fine. 

Then just using a fine detail brush and Purple With A Purpose, I drew a scroll and added 3 dots.  Then using my top coat (and the same technique for rhinestones I described here) to apply the light green and purple acrylic rhinestones.  Sadly, since I was doing this mani around midnight, my other hand didn't turn out as well:
I really like this design, and it reminds me of two wonderful ladies I know.  I will see y'all later!!  Happy Polishing!!!


Wednesday, May 8, 2013

ABC Challenge: R is for Rhinestones

Hi Lovelies!!  Happy Wednesday!  We are half way to Friday and the weekend.  I can't wait!  We have dance stuff on Saturday, but then my Mother's day gift is a trip to Ulta!!!  Yay!!  You may remember the closest Ulta is over 45 miles away, so I don't get to go very often.

Today is the ABC Challenge, and the letter is R.  I can't believe we are already to R!  Someone needs to hurry up and get the next challenge planned!!  Meanwhile, I have R is for Rhinestones!!
I Used:
Orly- Choreographed Chaos (light pink with subtle blue shimmer)
Crystazzi ss10 Aqua Flatback mix (crystal rhinestones bought at Michael's)
Crystazzi ss10 Crystal Flatback (crystal rhinestones bought at Michael's)

I really loved this design!  But of course, it sparkled, so what's not to love??  I started with two coats of Choreographed Chaos from the new Orly Mash Up collection.  Loved this color!!  It's a pretty, almost Barbie, color with a slight blue shimmer.  The formula was perfect and fast drying.

Next I put one thin coat of top coat and let that dry.  Next came applying the rhinestones.  I do my rhinestones a little differently.  I mean, I spend the money on crystal rhinestones, or acrylic ones, I want to see them sparkle and shine!! My way does work.  I wore these for right over 48 hours, 48 of my busiest hours possible...little sleep, dress rehearsal, shows, cooking, showers, etc and I only lost one.  But here is my way.  First be sure you are using a really good top coat, one that levels off (doesn't leave brush strokes).  Place one pretty thick dot of top coat where you want the rhinestone, then sink the stone into it.  This helps cover the edges and gives you longer wear.  Repeat this process with each rhinestone.  Be sure to do them one at a time, especially if you have a fast drying top coat.  This way you get all the sparkle!!

Be sure to join me in checking out all the other fabulous designs by these lovely ladies!!  Happy Polishing!!

Tuesday, January 1, 2013

Relaxed 31 Day Challenge: Red French Tips

Happy New Year Everyone!!!  I hope y'all are having a fabulous day!! Me?  I'm trying to keep my spirits up...our gas gauge for our heater is broken, which we discovered this morning (very late this morning, we slept in) when we woke up and it was 56 degrees in the house.  Why do these things ALWAYS break on the weekend and holidays???  But I'm not going to judge 2013 by this start...I still believe it's going to be a great year!

Anyway, one really exciting thing is that I've joined a new challenge!  This is a relaxed 31 day challenge with a bunch of wonderful ladies I've just met.  It was created by Kirsten at Geeky Owl and Emma at  Manicurity and I'm looking forward to getting to know them better.  Our first challenge is Red.  And I hate to admit it, but I'm going to cheat on this one a little.  My New Year's Eve nails were red and I still have them on.  I love this design and just can't part with them yet, lol!
So here is my design:


I Used:
Orly- Smolder
NYC- Matte Me Crazy
ProFX- Quick Dry High Gloss Top Coat
Crystal Rhinestones

Normally I'm not a matte kinda gal, I mean I named my blog after glitter, but I love this design.  Of course it doesn't hurt that it includes crystal rhinestones!
 
Be sure to check out all the other wonderful designs for today's challenge and Happy Polishing!!!
 

Monday, December 31, 2012

Red French Tip

Hi again!  As promised, here's my second post of the day.  If you are looking for a more classic look, or something more elegant, I may have what you are looking for:
This is a matte/glossy French tip.  And I promise the hardest thing about this design was figuring out what to call it!

I Used:
Orly- Smolder (dark red shimmer)
NYC- Matte Me Crazy (matte top coat)
Pro FX- Quick Dry High Gloss Top Coat
Crystal Rhinestones

I started with two coats of Orly Smolder .  After that had dried completely, I taped off the ends of my nails (see my tips for creating the perfect French tips here) and then painted the nail beds with the NYC matte top coat.  Then I painted the tips with the Pro-FX high gloss top coat free hand.  You do need to paint the tips to give your nails a smooth finish and feel.

One special thing I did was use real crystal rhinestones as opposed to the acrylic ones sold in beauty supply stores.  You can find them at your local hobby/craft store.  I found mine at Michael's for under $5.00.  I do have two different sizes on too.  Start by placing a dot of the matte top coat in the middle of your nail.  Then place the largest rhinestone.  Then repeat, placing the smaller rhinestones around the larger one.'

I hope y'all enjoy it!  Have a fabulous New Year's Eve!! And be sure to post pictures of your nails and outfits on my facebook page.  Happy Polishing!!

Sunday, December 16, 2012

Snowflakes- 12 Days of Christmas Challenge

Hi Everyone!!  Today is the 7th day of the 12 Days of Christmas Challenge.  Today's prompt was snowflakes.  I really love how this manicure turned out.  Here's the finished product:
I Used:
Orly- Halley's Comet (shimmery blue)
Orly- White Tops (white creme)
Liner Brush
Dotting Tool
Rhinestones

I started with two coats of Orly Halley's Comet.  I absolutely love, love this color!  To me it screams winter (unless it's Spring, then it screams Spring, unless it's Summer, then it screams...well you get the idea).  Halley's Comet is beautiful on its own, but made a perfect base for this challenge.

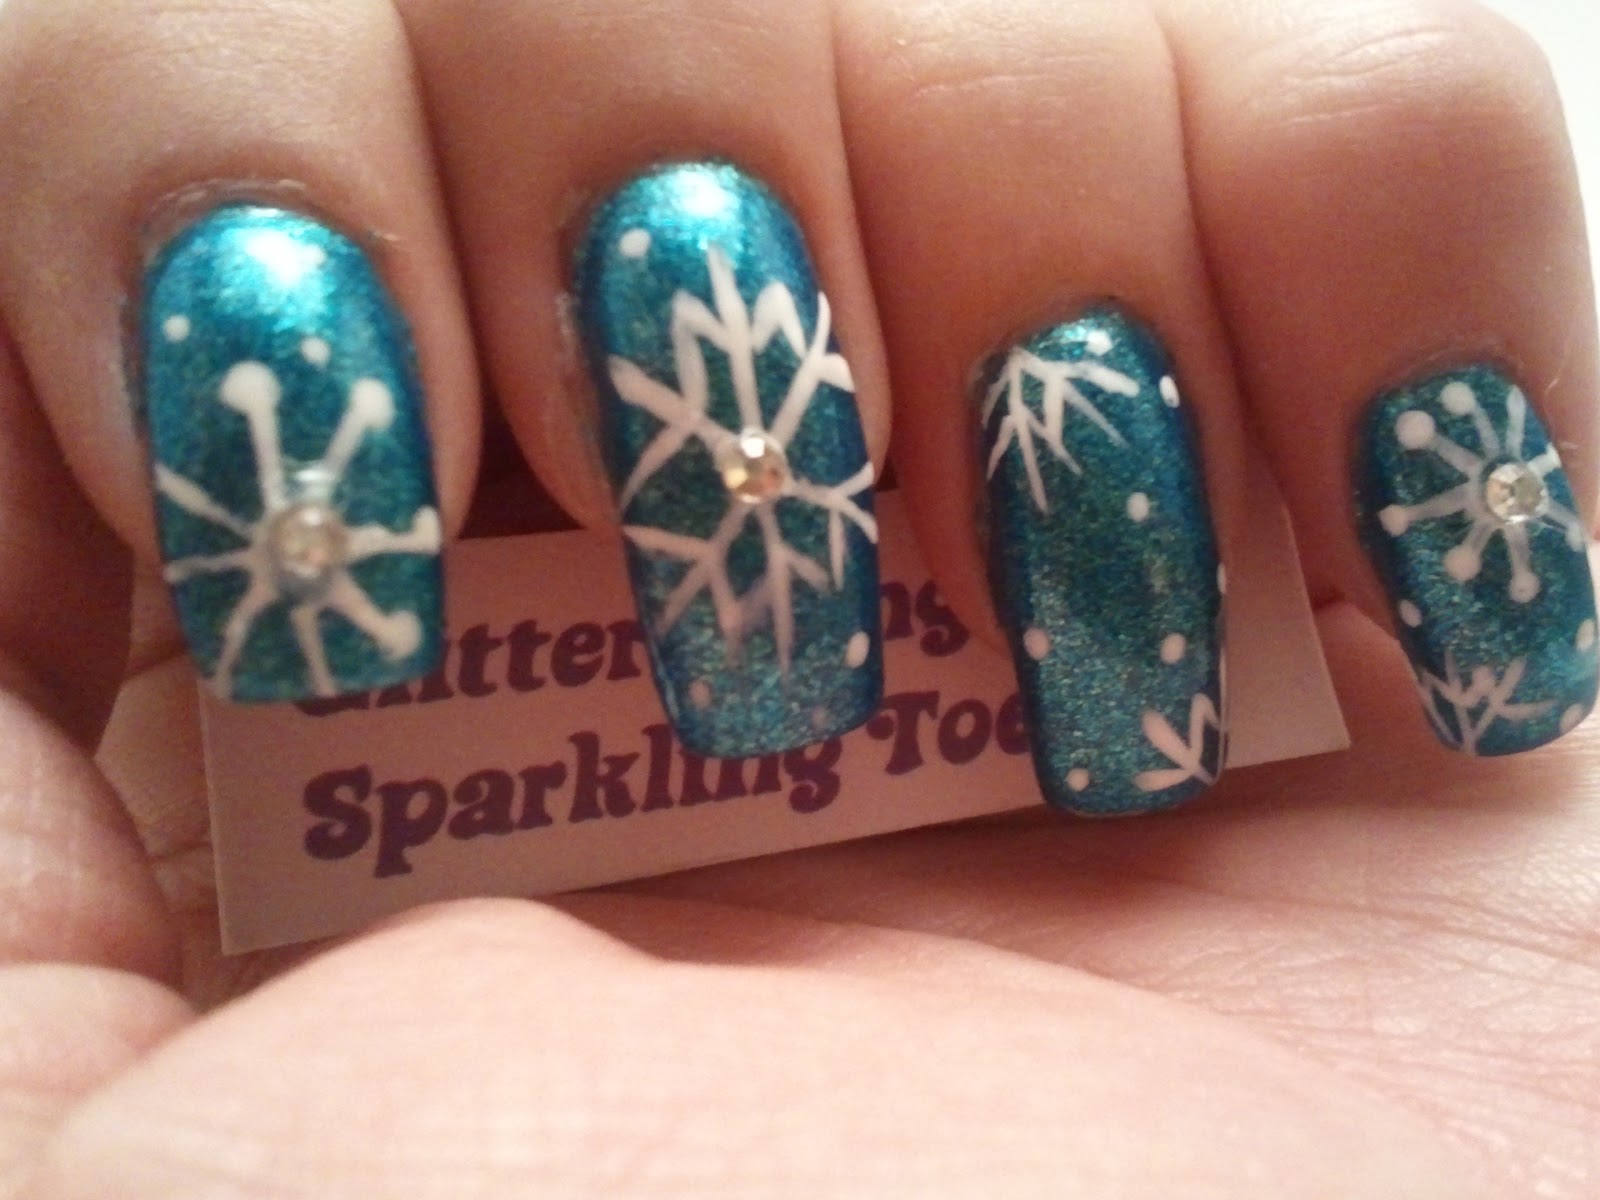
Then using a liner brush (be sure to look up brushes on my tip page) and Orly White Tops, I painted random snowflakes on my nails.  To make the snowflakes, I just painted intersecting lines.  Using a medium dotting tool, I added a few dots to some of the snowflakes and made random dots to represent snow.  Then I painted a pretty thick coat of my Pro-FX top coat and placed rhinestones in the middle of some of the snowflakes.

I hope y'all enjoy this manicure and be sure to check out all the fabulous designs by the other bloggers!!  This is the sweetest bunch of people and I know you will love their designs.  Happy Polishing!!


Sunday, December 2, 2012

Christmas Trees-12 Days of Christmas

Hi Everyone!!  I'm so excited!!  I've entered my very first nail art challenge!! It's the 12 Days of Christmas!  The first challenge was Christmas Trees. This took some thought, but I love how they turned out.  Just to let you know, I have six green trees, 2 red ones and 2 black ones.  Yes, black Christmas trees!  I've always had artificial trees (I'm allergic to the real ones) and years ago I saw this gorgeous, sparkly tree and instantly fell in love with it.  It was called a Black Alaskan Fir tree and it is actually black.  I'll post a picture as soon as I get it up. So I put up three trees each year, one black, one red and one white.  No green!

Here is the finished design:
I Used:
China Glaze- Hook and Line (grayish silver metallic)
China Glaze- Polarized (mainly silver glitter)
Orly- Chocoholic (brown with a silver shimmer)
Orly- Torrid (red shimmer)
Icing- Twilight (black with black glitter)
Wet-n-Wild- SaGreena the Teenage Witch (medium green shimmer)
Pure Ice- Silver Mercedes (silver metallic)
Pure Ice- Jaguar (gold metallic)
Liner Brush
Rhinestones (multiple colors)
Glitter (various shapes and colors)
Silver and Gold Beads

I started with a base of two coats of China Glaze Hook and Line.  Then using a liner brush, I made tree trunks with Orly Chocoholic by making one line down the center of my nails.  Then using the same liner brush I made small lines from the trunk outwards on both sides of the lines.  The green trees were made with Wet-n-Wild SaGreena the Teenage Witch.  The red trees were made with Orly Torrid and the black trees were made with Icing Twilight.

Using China Glaze Polarized I made a small line at the tip of my nails for the "floor".  The garland was made using the liner brush and Pure Ice Jaguar and Silver Mercedes.  I just made zigzag lines across the trees.  Next it's time to trim the trees!!  I just used a variety of glitter, rhinestones and beads to create all the decorations and topped each tree with a star.

Don't forget to protect your design with a top coat  And be sure to check out all the other wonderful designs by the folks in our challenge (links after the pictures)!!  Happy Polishing!!


And here are the links to the other wonderful bloggers: