Showing posts with label diagonal. Show all posts

Thursday, June 11, 2015

Blue & Purple Glitter Color Block

Hey Y'all.  I just wanted you to know that this is the first of several "scheduled" posts.  Scheduled means they will appear on their own, and because of that, there won't be this little intro part from me.  It will go straight into the design/review.  You may remember me telling you I had a family emergency.  It was that my father-in-law had been placed in hospice.  And now, his suffering is over.  I am so grateful that we were able to go and visit him, talk to him and spend some time with him last week.  I lost my own father 20 years ago to cancer and my father-in-law stepped right in and filled that void in my life.  And even though I'm heartbroken that he has passed....well, let's just say cancer sucks.

And on a lighter note, he was a huge supporter of my little nail obsession!  And for today, I have a Blue and Purple Glitter Color Block mani for you:
I Used:
China Glaze:  DJ Blue My Mind, an ultra bright sky blue crème
Studio M:  Grape Escape, a neon purple crème
CBL, Colors By Llarowe, Nitro, a clear base packed with blue and purple small glitter
Scotch Tape

First, thank you, thank you, thank you, to my love Liz at A Mani Maniac for sending me the Studio M and the CBL!!!  My very first CBL too!!  And it's glitter!!  And it's purple and blue!!  It's perfection!

Now on to the mani.  I love this mani, and this style, because I received so many compliments on it while I was out and about, and yet it's so easy to do!  I started by painting my nails with China Glaze DJ Blue My Mind, an ultra bright/neon sky blue crème.  Then, I placed scotch tape (remember to stick it to your hand a few times to remove some of the stickiness) on a diagonal across my nails, and painted a pretty thick coat of Studio M Grape Escape.  Grape Escape (drool), is a fabulously gorgeous neon purple crème.  Be sure to remove the tape as soon as you have painted the nail.
Once the nail has dried completely, place the tape on your nail diagonally, going the opposite way.  Like in the above picture.  Then I added Nitro by Colors by Llarowe.
Add top coat and you're done!

I hope y'all have a fabulous day, and be sure give your loved ones an extra hug today.

Happy Polishing!!

Friday, March 27, 2015

Purple and Pink Glitter French Tip

Hey Y'all!!  TGIF!!  I would be excited for it being Friday, except it's really windy and cold today and it's supposed to be in the 20's tonight and tomorrow night.  What part of Spring doesn't Mother Nature understand??  I want my shorts back! 

So, for today, I have a Purple and Pink Glitter French Tip/Block Mani:
I Used:
OPI:  Lost My Bikini in Molokini, a medium purple cream
Butter London:  Rosie Lee, a bright micro pink glitter in a clear base
Salon Perfect:  Razzle Dazzle, a purple and holographic micro glitter in a purple jelly base
Scotch Tape
I started with two coats of OPI Lost My Bikini in Molokini, a pretty, highly pigmented purple crème.  Once that had dried completely, I placed scotch tape across the nail diagonally and painted the color closest to the tip.
Then I placed the tape a little further down the nail and painted the next color.  Be sure to only put tape on the outside edge, not over the glitter.  Otherwise, you will lift the glitter.  And don't worry about going over into the other glitter, it really won't show.  You just need the clean edge on the outside.

I love how this turned out.  It feels so Spring-like to me.  I hope you enjoyed it too!

Happy Polishing!!

Tuesday, December 24, 2013

Christmas Nails

Merry Christmas Y'all!!!  I hope you are having a fabulous day!!  I had so much I needed to do for today, but blood pressure issues kept me up almost night, so it looks like I need to schedule a nap too.  But I wanted to make sure that I got this mani up for you...especially after promising it on instagram yesterday.

So for today I have one of my favorite Holiday nails for you.  I think these are great for Christmas, New Year's or even just because:
I Used:
China Glaze- Just Be-Claws (red foil/shimmer)
Finger Paints- Sparkle Top Coat (gold micro glitter in milky/clear base)
Gold Striping Tape

This is an easy, elegant design.  I started with two coats of China Glaze Just Be-Claws, a gorgeous red foil/shimmer.  This is a gorgeous red that just screams the holidays.  Next came the gold striping tape.  This can be found at bornprettystore (discount code in the right margin, just click and it will take you to the site), Sally's Beauty Supply, a many other stores.    Just lay two strips down horizontally on your nails.  My biggest advice is to NOT wait until your polish dries completely.  If you do it when it's still tacky, the tape adheres much better.  But, once you lay the tape down, it has to stay there, you can't move it.  If you're not real comfortable with striping tape, go ahead and let your polish dry completely and just use two coats of top coat to help seal it.
Once that was done, I used Finger Paints Sparkle Top Coat and painted in between the tape.  Then I just topped it all of with one coat of Seche Vite top coat.

I hope y'all enjoyed today's design.  I also hope y'all have a Very Merry Christmas!!!  I'll have a post up for you in a couple of days, but I'll see you on facebook and instagram!!  And be sure to share your Christmas goodies with me there!!  Happy Polishing and Merry Christmas!!

Wednesday, April 24, 2013

ABC Challenge: P is for Polka Dots

Hello my Lovelies!!!  How are you today?  Are you glad the week is half over?  I'm not.  Saturday starts theater week for my little one.  That means 5 days of rehearsing for the ballet "Snow White" in the actual theater, from 5pm to 9:15 pm, followed by shows in three days.  It is an exhausting week for her and me.  I honestly don't know how she does it.  Me? I'm already stressing.  I've been running around trying to make sure she has enough tights, false eyelashes, shoes are in good shape....ugh.

Anyway, on to the challenge!  Today's ABC Challenge is the letter P and I've done Polka dots.  Just a warning, you may want to put on your sunglasses:
I Used:
Nina Ultra Pro- French White (white crème)
Orly- Glowstick (neon yellow)
Orly- Hot Shot (neon pink)
Scotch Tape
Large Dotting Tool

Bright, huh?  Wait!  You have to see it out in the sun:
I love this!!!  The colors are just, wow! 

To create this mani, I started with two coats of Nina Ultra Pro French White.  To make neon pop and live up to its full potential, always start with a white polish. I then topped it with two coats of Orly Glowstick, a phenomenal bright yellow (I'll have a review of Glowstick in a couple of days). Once that dried, I placed a piece of scotch tape diagonally across my nail and painted a coat of Orly Hot Shot, a medium pink neon (it looks a little more orange in the photos, but it's actually a pretty pink).
Then using a large dotting tool (a pen would work great for this) and the opposite color, I started making the polka dots.  Start the dotting on the line and make sure the dot touches the line so that it looks like it's running.  Then just keep making dots in a line to the edge of your nail.  Finish with a top coat. 

This is such a neat effect, and the colors just screamed summer to me.  And I can't begin to tell you how many compliments I got on it.  I hope you enjoyed this mani.  Be sure to follow the links below to see what the other fabulous ladies have come up with for P!!  Happy Polishing!!


Monday, February 18, 2013

Dotty Pedicure

Hi y'all!!  I told you I had a lot for you today!!  I hope you have checked out my new tip on saving your hands from acetone and my review of OPI Stay the Night Liquid Sand!!  And now I have a new pedicure for you.  I'm so sorry because I seem to forget to post my pedicures.  But that is going to change starting now!!  (fyi: any of the manicures I've posted with the exception of water marbles, can be done on your toes too!!)

So here is my current pedicure (and forgive the scrunched up toes, but man it was cold outside when I took these):
I Used:
Sinful Colors: Black on Black (black crème)
Orly- Purple Crush (purple neon)
Dotting Tools (check out my tip page for household alternatives)
Scotch Tape

I started by painting my toes, alternating between the purple and the black (remember to use a base coat, just like on your finger nails).  I did this because I could fit the design on my big toes only.  One of the many curses of having small feet!  That and never finding grown up shoes in my size!!  Grrrrr!!  Anyway, if your nails are bigger then paint all of them with the purple.  My big toe was painted first with the purple.

When the purple dried completely, place scotch tape diagonally across your nail and paint a thicker coat of black.  Immediately remove the tape.  Then using the opposite color, place dots along that diagonal line:
Alternate the color and sides you dot.  In other words, dot one black dot on the purple side, then one purple dot on the black side.  Do this all along the line and it will look like the dots are melting into the sides.  It doesn't have to be perfect.  No one is going to get that close of a look.  Mine are a tad off, but my feet are so darn far away!!  Once that line is finished, dab on dots in the opposite color to fill in the space.

If you can do this design on all your toe nails, yay!  If not, I just painted my toes, alternating between the purple and black and then dotted them with the opposite color.  Don't forget your top coat.

I hope y'all enjoy this pedi, and I promise to be more vigilant on posting my pedicures.  As always, if you have any questions let me know.  Leave a comment below or email me (address is on the Contact page).  Happy Polishing!!

Tuesday, January 15, 2013

Day 11: Polka Dots, R31DC

Howdy Everyone!!  How's your Tuesday going?  I'm just hoping for a better Tuesday than Monday!!

Today's prompt is Polka Dots!  I love dotting.  It's an easy way to get a fun and unique look.  I have several dotty manicures worked up on my nail wheels that I've never worn, so choosing which one to do for this challenge was difficult.  So I finally had my almost teenager decide for me and I love the one she chose:
I Used:
Ulta- High Roller (very shimmery light gold)
Wet-n-Wild- I Red a Good Book (red crelly)
NYC- Times Square Tangerine Crème (orange crème)
Kleancolor- Neon Yellow (yellow crème)
China Glaze- Def-Defying (chartreuse green crème)
Ulta- Blue Streak (medium blue crème)
Wet-n-Wild- On a Trip (purple crème)
Dotting Tool

I started with two coats of the gorgeous Ulta High Roller.  Love this color!  Once that had dried completely, I used the smallest dotting tool to create the dots.  You can also use a toothpick or a needle to make the dots.  I started at the tip with red, then followed the ROY G. BIV rule: red, orange, yellow, green, blue, (left out the indigo) and purple.  Then a coat of top coat.

I hope y'all enjoyed this manicure.  Be sure to check out the rest of the ladies manis and make sure that you've entered my GIVEAWAY!!!

Check back tomorrow for Day 12 of the R31DC: Stripes AND my first day of the ABC Challenge!!  Happy Polishing!!


Friday, January 11, 2013

Day 9: Rainbow, R31DC

Hi Everyone!!  How are y'all doing today?  Any big plans for the weekend?  There is so much going on this weekend I'm sure it's going to be fun.  "The Vampire Diaries" are filming in town.  You may think so how will you ever see them?  But when I say I have a small town, I'm not kidding.  Downtown is one block.  And TVD puts signs up pointing to where everything is!!  And all I can say about Ian Somenholder is, drool!!  And yes I've met him!!  And my almost teenager is getting her first pair of pointe shoes!!  And that means a trip to the city!!!  Wonder if there is an Ulta near the dance store?

Ok, enough about all that, on to the challenge! First I've decided to abbreviate it to R31DC as opposed to writing out Relaxed 31 Day Challenge.  Next, today's prompt is rainbow.  I didn't know what I was going to do until the blue  challenge last Monday (sorry, for some reason I can't get the link to work today).  So here is my rainbow:
I Used (from lightest to darkest):
Green:
     Pure Ice- Wild Thing
     Wet-n-Wild- SaGreena the Teenage Witch
     Finger Paints- Avante Garde Green
Yellow:
     NYC- 114A
     Kleancolor- Neon Yellow
     Spoiled- Designated Driver
Blue:
     Bonita (name missing)
     Wet-n-Wild- Saved by the Blue
     NYC- Skin Tight Denim Crème
Red:
     A mix of China Glaze- Rougish Red and white polish
     Wet-n-Wild- I Red a Good Book
     Orly- Torrid
Purple:
     NYC- Lavender Cupcake
     Wet-n-Wild- On a Trip
     China Glaze- VIII

I had a lot of fun creating this manicure, despite the first words out of the almost teenager's mouth that I got the colors in the wrong order, lol.  I love it anyway!!
And here is the rest of the challenge:
Hope y'all have a fabulous weekend!!  Be sure to check out the other designs and check back next week as I add another, albeit, relaxed challenge! Happy Polishing!!

Thursday, December 27, 2012

Color Block Manicure

Hi Everyone!!  I have something a little different for you today.  Although it would make a great mani for New Year's Eve depending on what colors you choose, or even use these colors.  Some time ago I saw a manicure using copper, black and blue together and I've been dying to use this combination.  So I decided to do a color block.  This is such a cool mani because truthfully, it's like 10 different designs.  You could use all 10 or pick one and do all 10 fingers in one design.  Here is the finished product:
LOL!  Ok, it's upside down for some reason, but you get the idea!
I Used:
Zoya- Penny (shimmery copper)
essie- Mesmerize (blue creme)
China Glaze- Liquid Leather (black creme)
Scotch Tape

I started with two coats of Zoya Penny.  I love this polish!  But I didn't think it would every dry. I ended up topping it with one coat of my quick dry top coat. 

The next color used was essie Mesmerize.  I randomly placed scotch tape on my nails (remember to put the tape on your hand first to remove some of the stickiness) and painted one thick coat and immediately removed the tape.  Once the blue was dried, I repeated that step with the black polish.

This is a fun mani because there is no right way to do it, so have fun!  Just remember to keep it random! And as always, Happy Polishing!!

Really? Again with the upside down photo?
Follow Me on Pinterest

Friday, November 9, 2012

Fall Glitter Design

Hi Everyone!  I'm sorry this is being posted so late, but it's been a busy day (see the end of the post).  So this is going to be a quick post :)

Here is the final design:

I Used:
Spoiled- Steel the Snow
Orly- Buried Alive
Finger Paints- Fall of Surprises
Scotch Tape


I started with two coats of Spoiled- Steel the Snow, a dark taupe.  Once that has dried completely, use scotch tape diagonally across your nails:

Ok, that picture is for 2nd part, but you get the idea.  I used Orly- Buried Alive, a dark shimmery brown, for the bottom stripe.  As soon as you paint the color remove the tape.  Let the polish dry completely before the next step.

For the last stripe, tape your nails like the picture above.  For the glitter, I used Finger Paints- Fall of Surprises, a pretty copper glitter in a clear base.  This required two coats of polish so leave the tape on your nail until you've completed the second coat.  Don't forget to top the design with a top coat.  I used two coats to get a smooth finish.


So my poor daughter, who shall remain nameless by her order (lol), has been sick for a week and felt horrible today.  And then her baby brother, Count Damon, and baby sister, Countess Delilah weren't feeling well.  My almost teenager won't let me post her picture, but here are her baby siblings:

Count Damon
Countess Delilah
Yes, these are my precious babies (don't judge me) and they rule the house.  So a day with them all feeling yucky meant it took me 12 hours to get this posted.  I hope y'all enjoy the design!!  Happy Polishing!!

Friday, October 12, 2012

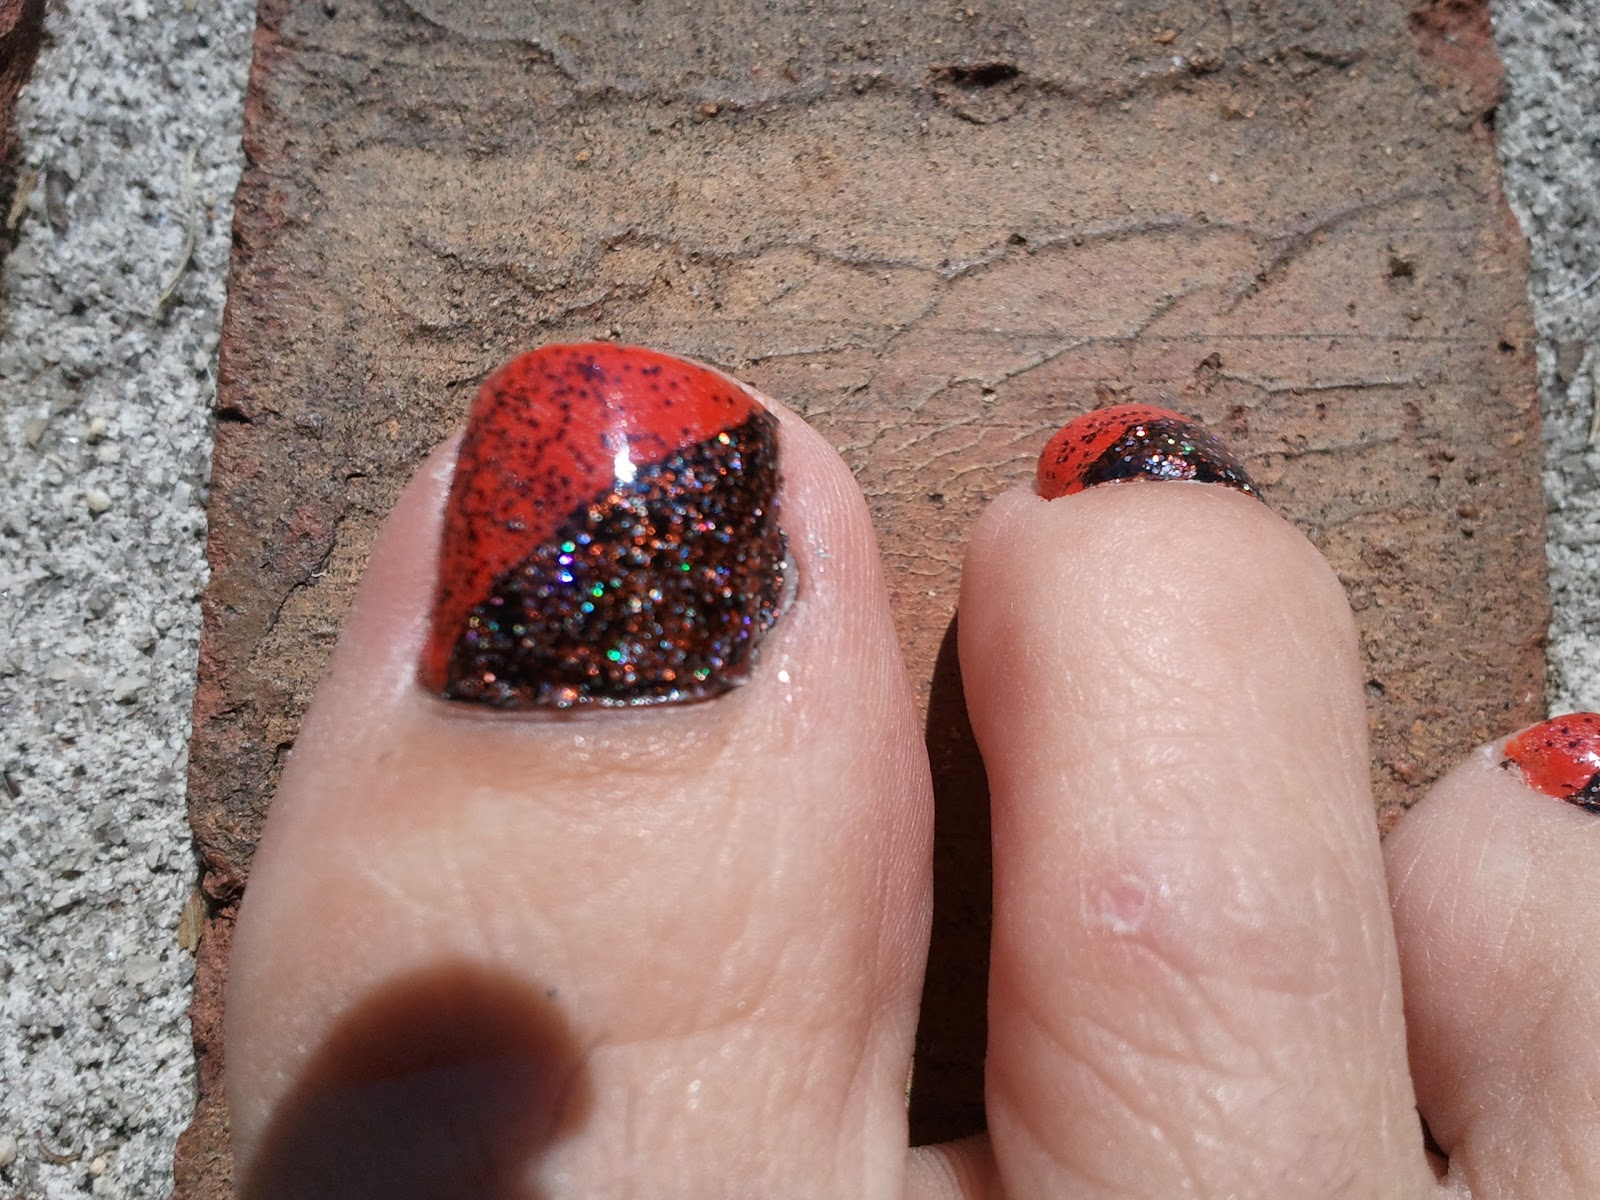
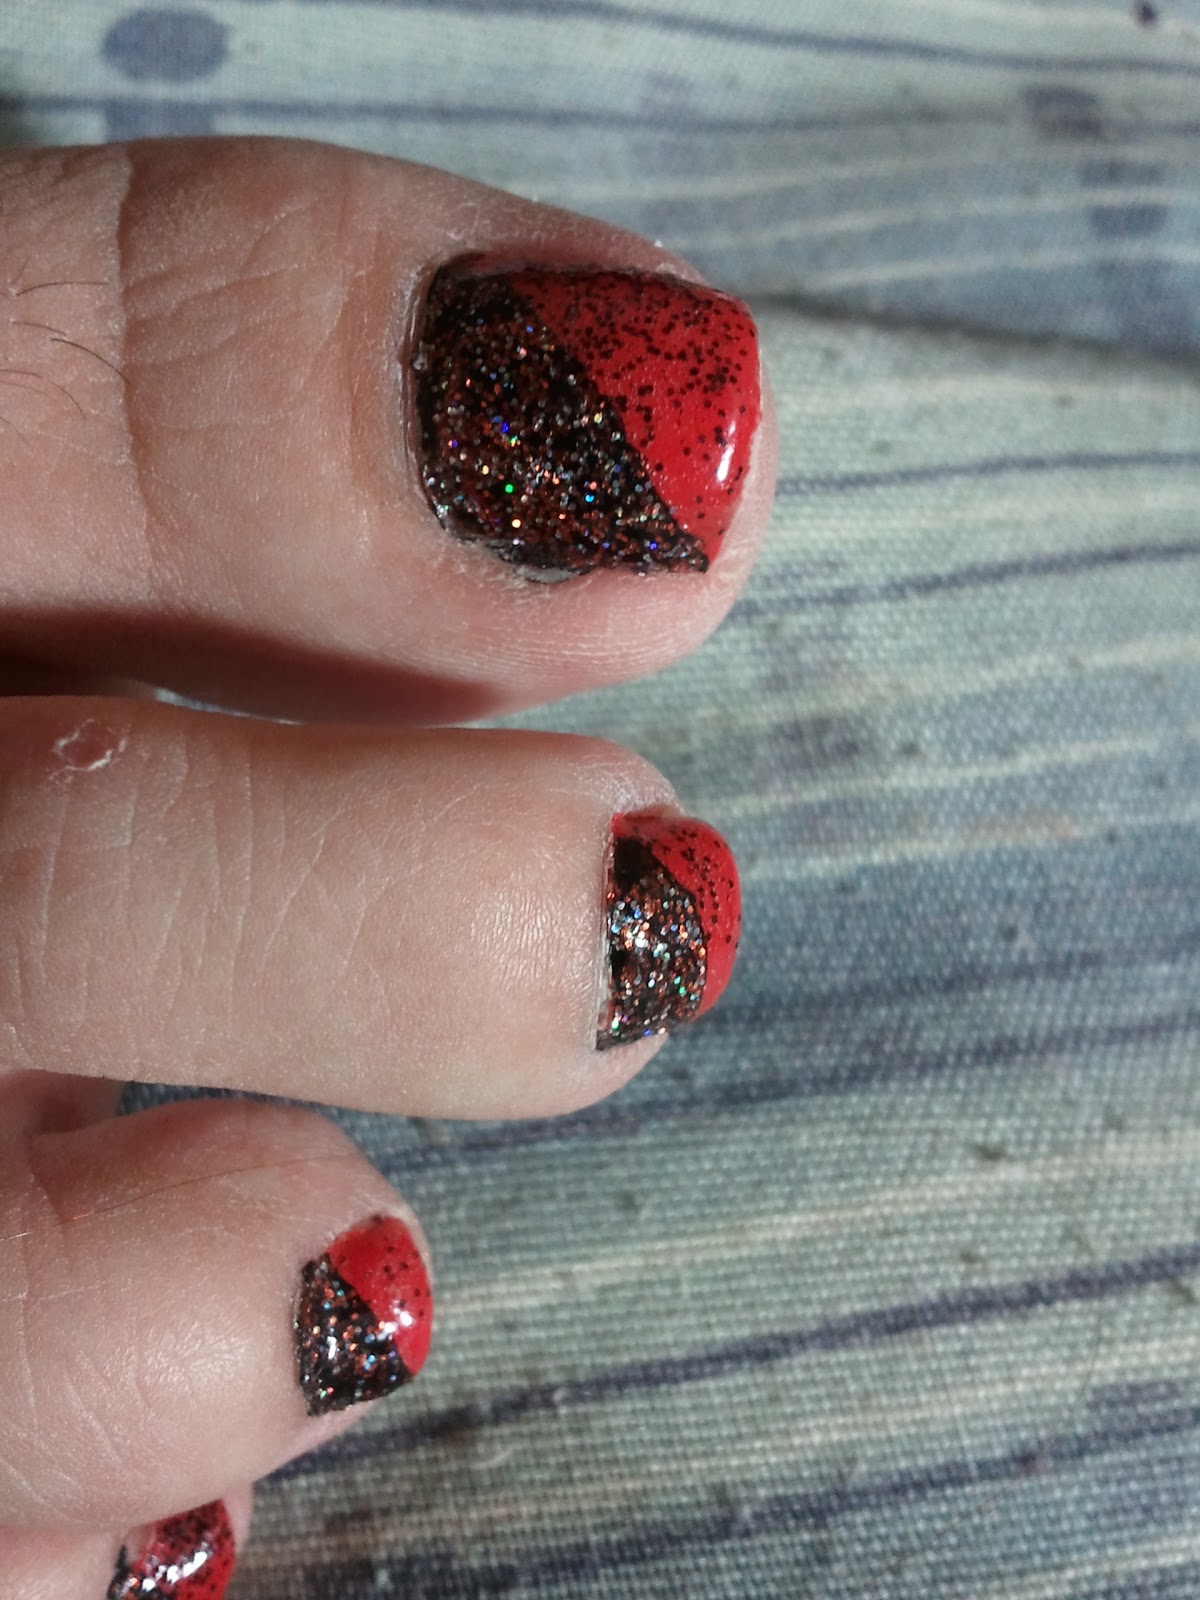
Halloween Toes (Orange and Black Pedicure)

Hi Everyone, I have a wonderful, glittery art design for your toes.  I realize that a lot of folks aren't wearing flip-flops in the fall (although we are here in the south), but you still see your toes, so keep them polished and sparkling. And this pedicure is guaranteed to put you in a Fall mood.

I Used:
China Glaze- Liquid Leather (black)
China Glaze- Roguish Red (orange-red)
China Glaze- Glitter Goblin
Black Glitter
Fan Brush (optional)
Scotch Tape

Start with two coats of Roguish Red.  When that has dried completely, place scotch tape diagonally across each toe nail.  Remember to place the scotch tape on the palm of your hand a couple of times to remove the stickiness.  Make sure the edge of the tape is placed firmly down on your nail so the polish won't leak underneath. 

Next, paint a thick coat of the black polish, but DO NOT remove the tape.  I know, that's different.  Let that dry for a few minutes, then paint Glitter Goblin over the black.  Glitter Goblin (orange and holographic glitter in clear base) is pretty dense so one coat will probably work.  You want some of the black to show through.  As soon as you've painted the glitter, immediately remove the tape and let dry completely.

For the next step, work on one nail at a time.  Carefully paint one coat of clear polish (or top coat) over the Roguish Red only.  While that is still wet, using a fan brush (or your fingers) lightly sprinkle black glitter over the orange half of your nail.  Repeat with each nail, then top with your favorite top coat.

I hope you enjoy your glittery toes!  Happy Polishing!!


Thursday, October 4, 2012

Purple and Yellow Dots

Hi everyone!!  I hope y'all are having a fabulous day!  I have a new design for you today and I hope y'all like it.  This one is fun because depending on the colors you choose, this design can look fun, cute or sophisticated.  I came up with this design because I had just bought these two polishes and couldn't wait to wear both of them.

I used:
Orly- Hook Up (yellow shimmer)
Wet-n-Wild- Buffy the Violet Slayer (purple shimmer)
Scotch Tape
Large Dotting Tool (see link below for making your own)

As always, start with a base coat, regardless if your nails are natural or acrylic.  This is a really important step for using the Wet-n-Wild Buffy the Violet Slayer...it stains...a lot!  But it's a beautiful color and it does wear away in two to three polish changes.

After the base coat, apply two coats of Orly's Hook Up.  When that has dried completely, place scotch tape diagonally across your nail.  Be sure to take the tape off and on your hand a few times before placing it on your nail.  This helps to remove some of the stickiness that would pull your polish off.  Make sure that the tape edge is flat on your nail so there won't be any leaking.  Then paint a thick coat of Buffy the Violet Slayer.  Immediately and carefully remove the tape.

Then using a large dotting tool (click the link for tips on making your own, affordable dotting tools), make  large yellow dots in the purple half of your nail.  Finish with a top coat.  Happy Polishing!!

Friday, September 14, 2012

Rhinestones and Dots

Ok y'all.  Something has happened to me that I (and my family and friends) thought was impossible...I over rhinestoned something!  Almost everything I own glitters.  If I can get it to hold still long enough, it's getting bedazzled!  The words "tacky" and "understated" do not exist in my vocabulary.  Until my first attempt at this manicure.  At the end of this post I'll put this first attempt that I, the sparkle lover, didn't like.

I did however, love my finished manicure.  I hope you do too!

I used:
Sinful Colors- Heavy Metal
Orly- Charged Up
NYC- Lavender Cupcake
Wet-n-Wild- Tickled Pink
China Glaze- 108 Degrees
Pro-FX Quick Dry High Gloss Top Coat
Purple Rhinestones (3mm)
Medium Dotting Tool


Here are the supplies:


And my inspiration:

To start this manicure, paint two coats of silver (Sinful Colors Heavy Metal) polish for a base color.  Once that is completely dry, use a medium size dotter (or a toothpick) to create the lines of dots.  Start in the middle of your nail with the darkest color (Orly's Charged Up) and dot a diagonal line in the middle of your nail.  Then going out from that line, dot the colors in order of their shades, darkest to lightest. (On my nails, that is NYC Lavender Cupcake, China Glaze 108 Degrees and Wet-n-Wild Tickled Pink.)
For the accent nails, place a small dot of top coat on your nail where you want the rhinestone.  Place the rhinestones in a vertical line.  Once you've completed the rhinestone line, dot the rest of the nail to match the rest of your manicure.

Remember to put a top coat on all your nails, including over the rhinestones, and you're done!  As always, I would love to hear your comments or questions.  Happy Polishing!!


And...the first attempt, lol: