Monday, January 27, 2014

Review Born Pretty Store Striping Tape

Press Sample

Hey Y'all!!  I hope y'all are staying warm!!  It's ridiculously cold here!!  Today's high is 32 degrees.  That's the high!  WTH??  I can't wait for Spring.  I feel like going to bed and not getting out until the temperatures reach the 70's! At least I'm home now and have the central heat on, every space heater and am bundled up after spending all morning and half the afternoon out.  Although I did get to go to Red Lobster for a pre-birthday lunch, yay!!

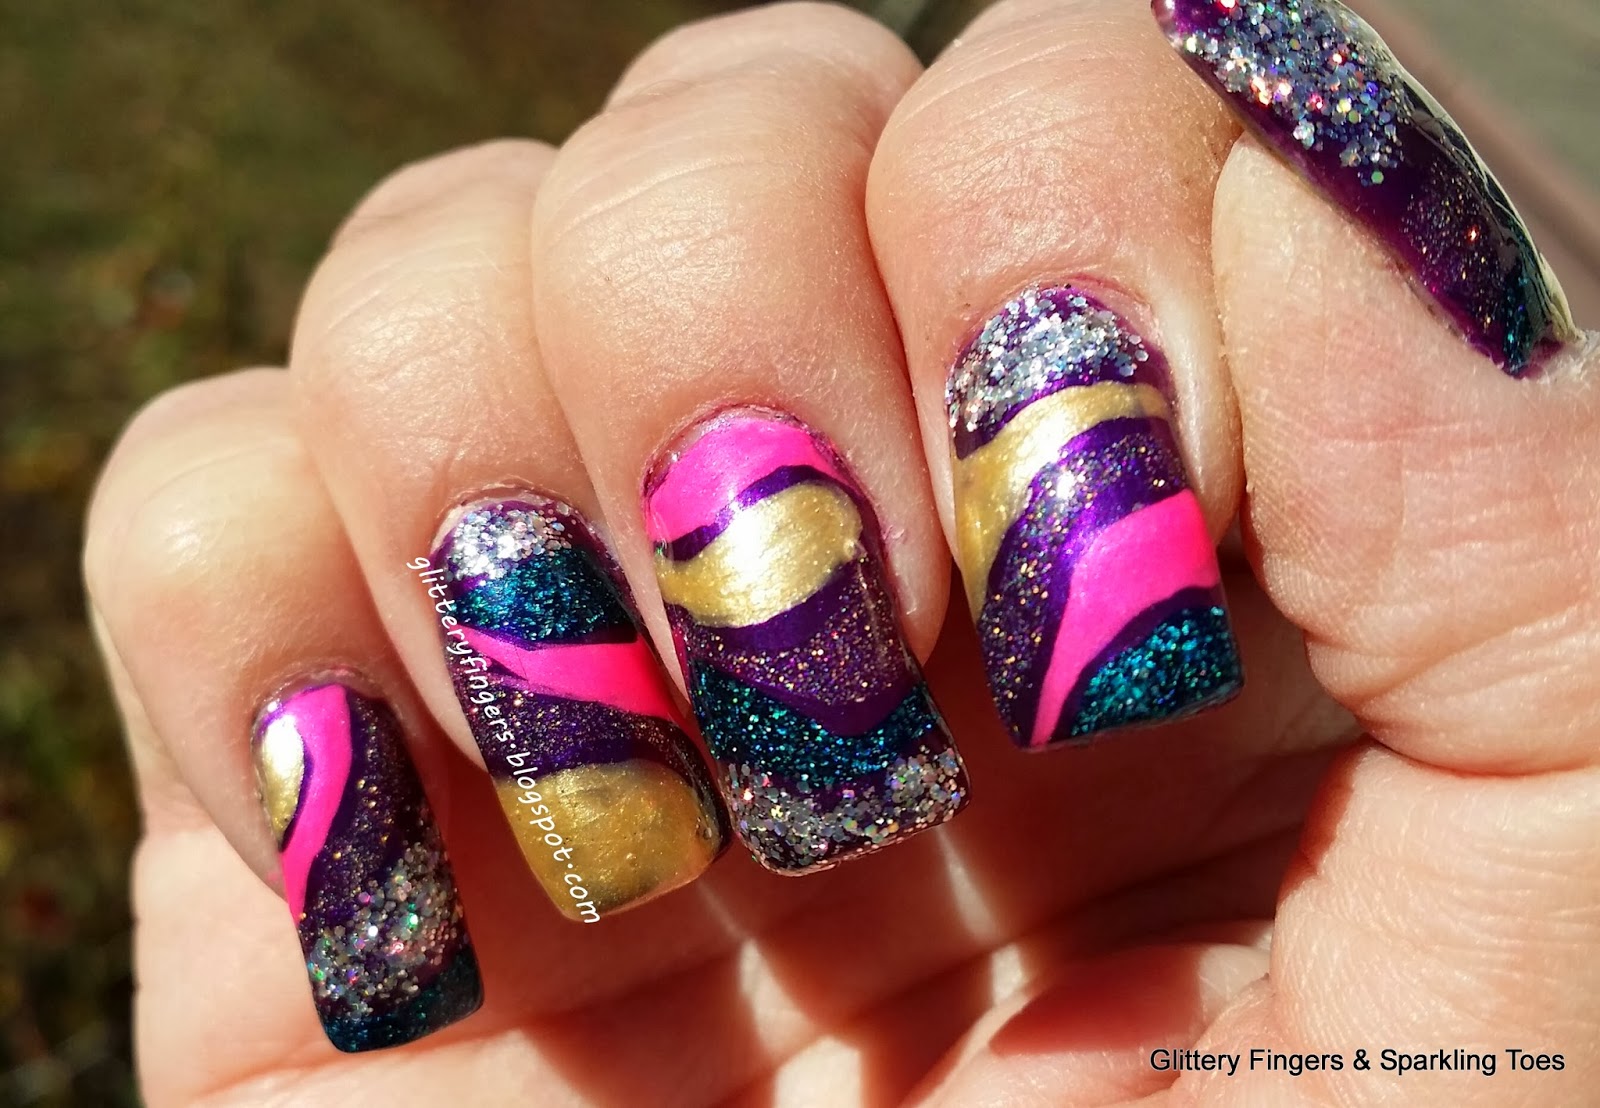
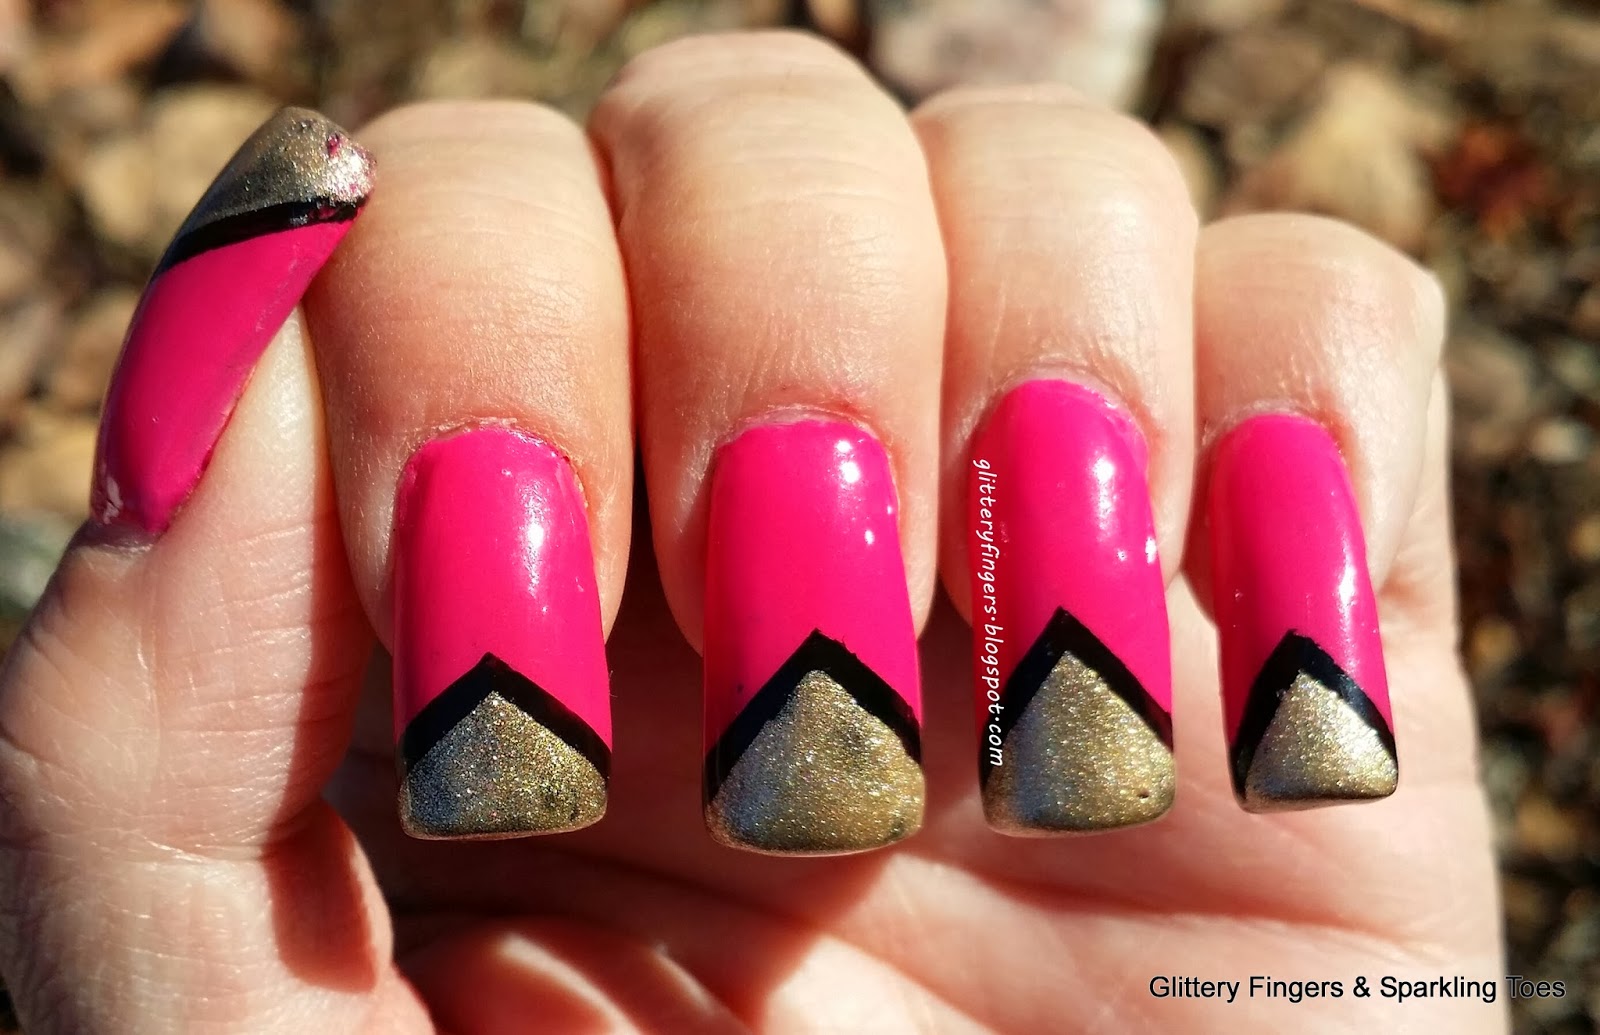
And I have some great striping tape for you today from Born Pretty Store!!
The pictures show a base of Orly Grave Mistake, a deep red crème from the Dark Shadows collection.  Then Born Pretty Store sent the above striping tape for review.  It's a gorgeous holographic gun metal design.  It truly needs to be seen in person, it is so pretty!!
I love, love, LOVE using striping tape for nail art!!  It can be used so many different ways!  My favorite way is the using the tape on the nails like in the pictures above.  I do have a couple of tips for you when using striping tape.  First, don't let your nails dry completely.  Apply the tape while they are still slightly tacky.  Once you have the tape where you want it, carefully press it down.  This will make the tape wear longer.  Also, cut the tape just short of your nails so nothing is hanging over the edge.  One last tip, using tweezers to place the tape can help.  Cut lengths slightly longer than your nail, place the tape, then I use nail clippers or cuticle scissors to trim the tape to the proper length.  And don't forget the top coat!!
Another great way to use striping tape is in making clean, straight lines for nail art like in my Gwen Stefani French Tips:
And the absolutely best part?????  Right now you can get
3 rolls of striping tape for just $0.99!!
That is a great deal!!  This is only for a limited time so hurry!!  But even if you miss this deal, the regular price for a set of 3 rolls is only $1.90!!  And if you use the code NE5J61 you can get an additional 10% off plus free shipping world wide!!  There are over 30 different colors to chose from.
 
I hope y'all have a fabulous day and Happy Polishing!!


The following products were furnished to Glittery Fingers & Sparkling Toes for review.  The opinions expressed are my own and were in not influenced in any way.


Wednesday, January 22, 2014

Mish Mash Challenge: Favorite Nail Art Technique

Hi Y'all!!  So the eastern part of the US is in a deep freeze....again!  I can't begin to tell you how much I'm looking forward to Spring!  All I know is that the stupid groundhog better not see his shadow, or he and I are going to have some words!!

But, at least I don't have to leave the house and, it's Wednesday and that means it's time for the Mish Mash Challenge!  This week's theme is Our Favorite Nail Art Technique and if you know me, you know that my fave is Water Marble!
I Used:
Orly- Teal Unreal (dark crème teal)
China Glaze- Pelican Gray (very light gray with a silver shimmer)
China Glaze- Charmed, I'm Sure (dark, smokey purple)

Click HERE for my water marble tutorial!!!!
I LOVE water marbles!!  They were one of the first techniques I learned and the possibilities are endless!!  Using different color combinations and how you draw your designs....just so much goodness!!
And of course, these are my favorite colors!

Please join me in checking out every one's favorite technique!  I can't wait to see them!!

Stay warm and Happy Polishing!!


Tuesday, January 21, 2014

TIOT: Orly Cupcakes and Unicorns

Hey Y'all!!  Happy Tuesday!!  I hope y'all are staying nice and warm today.  Anyone else tired of the cold yet??  We started the day at 47 degrees and ever since the temperature is going down while the wind speed is going up.  I've had it!  I want Spring!!

But it is Tuesday and I do have an untried for you :)  Thanks to the fabulous Liz of A Mani Maniac, who sent me one of my biggest lemmings, Orly Cupcakes and Unicorns:
Ok, I know I say this a lot, but seriously y'all...photos do not do this polish justice.  You truly have to see it in person to see how fabulous it is!
Cupcakes and Unicorns is a light pink base with micro pink glitter and pink holographic bar glitter.  Pictures show two coats over OPI Vant to Bite Your Neck (a dark purple crème) with top coat.  The formula was great on this, though I wish there was a little more bar glitter.  And that would be my only con.  I didn't dig for the bar glitter.  This is a polish I would recommend storing upside down if you can, and if you can't, invert the bottle for about 15-30 minutes before you use it.  I think that will take care of the sparse bar glitter.
Now for someone who has owned black nail polish back when people didn't even know it existed, this is the girliest polish I own...and I LOVE IT!!

Thank you again to A Mani Maniac for this gorgeous polish!!  Be sure to check back tomorrow for the Mish Mash Challenge.  Happy Polishing!!

Monday, January 20, 2014

Gwen Stefani French Tips

Hey Y'all!!  First, wow!!  Thank you for all the love on facebook!!  I hit 1,100 likes this weekend and am thrilled!!!  Thank you, thank you!!  I'm gonna start collecting goodies for a Thank You Giveaway!! 

That was the icing on an already fabulous weekend!  See, today is my wedding anniversary.  24 years today.  I was 5 when we got married.  No, seriously, I was.  Would I lie to you?  Anyway, the hubby took me shopping.  We hit Saks Fifth Avenue and Sephora.  But before that, we went to lunch at our absolute favorite Italian restaurant, Ippolito's!  Yummy!!  That's where I ate a ton of garlic. Garlic makes me burp.  Garlic makes me burp like a 300 pound man named Bubba.  That explains why, in the middle of Saks Fifth Avenue, I let loose with a burp that would put any Bubba to shame.  Yep.  I did that.  I also quickly looked at my husband with a disgusted look and said, "Really?  Control yourself!"  Yep, I did that too!

Ok, on to today's post.  Today I have French Tips using the new OPI Gwen Stefani collection:
I Used:
OPI- Hey Baby (bright pink crème)
OPI- Love. Angel. Music. Baby (gold shimmer satin finish)
China Glaze- Liquid Leather (black crème)
Striping Tape

This was a fun and easy mani to do, it just takes a little patience because you have to wait for each color to completely dry before moving on to the next step. (I'll do a review of the polishes on a later post)

To start, paint two coats of OPI Hey Baby.  Remember to let it dry completely.  Then using striping tape (or you could use scotch tape), tape off a wide V at your nail tip:
Fill in with your black polish and immediately remove the tape and let dry.  Then tape off all but a small edge of the black V:
Then fill in with OPI Love. Angel. Music. Baby.  Remove the tape immediately.  Now you can either leave it just like this to keep the satin finish of the gold, or use a top coat over the whole design.  I used a top coat because I wanted to wear this for a couple of days and wanted to make sure it would last.
I hope y'all enjoyed today's design!  And thanks so much for stopping by!!  I'll be back tomorrow with a Try It On Tuesday polish.  And remember, if you tell anyone about the burp in Saks....my hubby did it!

Happy Polishing!!


Friday, January 17, 2014

Orly FX Galaxy-Part 2

Hey Y'all!!  I have part two of the new Orly FX Galaxy collection for you.  And thank you again to the fabulous Liz at A Mani Maniac for sending these!!  I do want to apologize for some of the pictures not being in the sun.  Apparently the sun hates Georgia and rarely visits us anymore, but these polishes sparkle.  Pictures just don't do them justice anyway.  Ok, let's get to it!  (Be sure to check out the last one!)

Starburst
Starburst is a light pink milky base with small red glitter, medium gold glitter and large circle matte white glitter.  Pictures show two coats with top coat.  First thing, I needed a third coat to really even it out, but it wasn't as obvious in real life.  I also had some previous staining on my pinky that I didn't think showed, but, yeah it does in photos :(
This is so pretty in real life!  But I would definitely recommend three coats.

Milky Way
Milky Way is a milky blue base with micro holographic glitters, small red glitter and medium holographic glitter.  Pictures show two coats with top coat.  Sadly there wasn't any sun while I was wearing this and pictures TRULY do not begin to do this polish justice.  This is my second favorite of the collection.  I'm going to have to try this again!
When you wear this, I again highly recommend three coats.

Intergalactic Space
Intergalactic Space is a dark blue base with micro blue glitter, small pink and purple glitter and large round matte white glitter.  Pictures show one coat over China Glaze Liquid Leather and top coat.
This one is my absolute favorite of the collection.  It's just so purty!!!

Bottom line?  If you like glitter, you'll love this collection. There wasn't a single one I didn't like/love.  And I give credit to Orly for mixing up the sizes and shapes of their glitter.  While it approaches the look of  indies, it's still different.  Does that make sense?  The only thing I wished they did was tell us which galaxies they were based on. Their info says each bottle was based on a specific galaxy.  Well ok, I can figure out Milky Way, but I wish I knew the rest.

I hope y'all enjoy your day!  Happy Polishing!!


Thursday, January 16, 2014

Orly FX Galaxy FX- Part 1

Hey Y'all!!  So the fabulous, incredible, generous Liz of A Mani Maniac sent me the ENTIRE new Orly Galaxy FX collection!!!  Not only am I so touched by her sweetness, I LOVE this collection!  Since I do love it so much, I've split it into two posts so I could add a bunch of pics!  So let's get right to it!!  Let me start by saying, photos do not do these polishes justice!

Black Hole
 

Black Hole is a black jelly with small red glitters, medium matte white glitters and blue bar glitters.  Photos show one coat over two coats of China Glaze Liquid Leather and top coat (I'll explain why at the end when I tell you about the formula, but it can be worn by itself without any problems).
This one was the now-a-teen's favorite.  I can't really pick a favorite, I love them all.
 
 
Star Trooper
 

Star Trooper is a black jelly absolutely filled with micro and medium gold glitter and small and medium white glitter.  Pictures show one coat (yep, that's just one) over two coats of China Glaze Liquid Leather and top coat.
Despite my refusal to play favorites, I really loved wearing this one!  It was so full of glitter and so sparkly!
 
 
Gravity Bound
 
 
Gravity Bound is a black jelly packed with blue and purple/fuchsia micro glitters and medium white glitters.  Pictures show THREE coats alone with top coat. 
Beautiful isn't it??  I do want to see what this looks like over black too.  Despite the lack of sun the entire time I wore this, it was all sparkly goodness.
 
The formula on these were good.  They did arrive from the back of a delivery truck on a day our temperatures were in the teens...a rare thing in Georgia, so they were pretty frozen.  Even after 24 hours I had to add thinner to the bottles, which is a normal occurrence when polishes freeze.  The only reason I layered them over black or some of them, was to make it easier to remove.  These definitely take the foil method (see my tips page for the foil method).
 
Orly said they based these polishes off of specific galaxies, and I believe it.  These are very outer space-y!  I love them all and they were even worth the foil method!  I sat around staring at my nails, they had a deep quality to them.
 
Thank you again to A Mani Maniac!!!  Look for the rest of the collection tomorrow!  Happy Polishing!!


Wednesday, January 15, 2014

Mish Mash Challenge: Two Colors You Would Never Normally Pair Up

Hey Y'all!!  It's Wednesday and that means it's time for the Mish Mash Challenge!  Now, I've said before that I was born with an incredibly strong tacky gene...meaning I love what other people find tacky.  According to my mother, it came from my grandmother (her mother-in-law, lol).  For example, there is no such thing as too much sparkle! 

Which brings me to this week's theme, Two Colors You Would Never Normally Pair Up.  Ummmm, such a thing exists?  I love weird color pairings, purple and red, blue and orange, I even love brown and black together!  So coming up with two colors that I don't think go together was pretty much impossible for me.  I decided to go with two colors that aren't my favorite together:  orange and purple:
I Used:
OPI- Vant to Bite My Neck? (dark purple crème)
Orly- Flicker (deep orange shimmer)
Make Up Sponge
And you want to know something?  I like this!  I didn't think I would, but...guess my tacky gene is still going strong, lol!

Be sure to join me in checking out everyone else's challenge mani.  I know they are all amazing!  I'll see y'all tomorrow!  Happy Polishing!!


Tuesday, January 14, 2014

TIOT: Orly Sunglasses At Night

Hi Y'all!!  I've missed you!!  It's been so crazy around here!!  Last week we had temperatures in the single digits, then we had a pipe burst and went two days without water (thanks to the Bestie that let us take showers at her house!!)...anyway, I 'm back!!  And it's time for Try It On Tuesday!

And thanks to my fabulous friend Liz at A Mani Maniac who sent me the best present ever, I have a lemming that has been on my wish list for two years!!!  Not only did I receive two lemmings, she sent me the entire new Orly Cosmos collection!!
And even though I just got this, I figure I could use it for TIOT since I've wanted it for so long....take a gander at Orly Sunglasses At Night:
Photos do not do this polish justice at all!!!  It's beyond gorgeous!  In fact, we need a new word...scrumptiouslicious???  Fantabulousness???
Sunglasses At Night is a black jelly polish with dark, gunmetal (looking at least, may be due to the black jelly base) holographic bar glitter.  Pictures show two coats of Sunglasses At Night over two coats of China Glaze Liquid Leather and top coat.
I chose to layer it over black because, 1) it's easier to remove glitter polish when there is a base and, 2) I wanted it to be really dark.  But the formula was fabulous, typical Orly.  I didn't have to hunt and place the glitter since the polish had a ton.  Suffice it to say, I love it!!!  It lived up to all my dreams!

Thank you again to the wonderful Liz at A Mani Maniac for the incredibly generous gift!  I LOVE YOU Liz!!!!

See Y'all tomorrow for the Mish Mash Challenge!  And be on the lookout for my swatches of the Orly Cosmic collection.  Happy Polishing!!


Wednesday, January 8, 2014

Mish Mash Challenge: Inspired by a Decade

Hey Y'all!!  So I'm a bit late getting this up today, but I had another night of 2 hours of sleep :(  So let's get right to it!  I'm finally back doing the Mish Mash Challenge!!  I missed a couple of weeks because of schedule and then a couple of weeks because of Inlinkz issues, but I'm back now!

And this week's theme is Inspired by a Decade (50's, 60's, 70's, etc.) and I went with the 70's.  I was a itty, bitty VERY young thing in the 70's, but whenever I think back on that time, my mother's wall comes to mind.  In our guest room, she had painted three walls white and on the fourth was this fabric that was indicative of the 70's.  It was huge white and yellow daisies on a black background. Did I mention the flowers were huge? Anyway, here is my rendition:
Y'all know the 70's were tacky right?  LOL
 
I Used:
China Glaze- Liquid Leather (black crème)
Yellow and White Acrylic Paint
Small Brush
Large Dotting Tool
Whether you like it or not, this does look exactly like my Mom's wall, lol.  I used the largest dotting tool to make the flowers.  Simply drag the dotting tool to make the petals.  Then I used a fine brush to paint the leaves.  Then top everything with top coat.
Be sure to check out all the other fabulous designs inspired by a decade in the links below!  Happy Polishing!!
 

Tuesday, January 7, 2014

TIOT: Miss Kitty's Mee-yow

Hi Y'all!!  Are you staying warm?  I sure hope none of you had to go out this morning...these temperatures all over the east are ridiculous!!  We set a record here last night of 5 degrees with wind chills in the negatives.  Um, nope.  Sorry, I can't do Tuesday, too cold.  I'm sending warm wishes to all y'all that have it cold!!

So it's time for TIOT: Try It On Tuesday!!  And not only has this pretty polish been waiting patiently for me to try it, I thought it looked perfect for the weather we all seem to be experiencing.  Today I have Elixir Laquer Miss Kitty's Mee-yow:
Isn't she the perfect wintery blurple polish?  The pictures show three thin coats with top coat.
I love this polish!!  Application was great.  It is a bit thin, but three light coats and it was completely opaque.  And despite it being thin, it didn't flood my cuticles, but I was really careful while applying it.  This is my first, and so far, only Elixir Lacquer, but I doubt it will be my last.
I ordered this from Color 4 Nails using a gift certificate I won.  Nicole is the brain behind this brand.  Her polishes range from $6.00 to $7.50, but sadly, she's currently out of Miss Kitty's Mee-yow.  But hopefully she will have it again soon, because I think this is such a perfect winter (or spring, fall or summer) blurple.  The shimmery goodness is almost too much!
 
I'm sending everyone in the eastern part of the US heat wave wishes.  And for everyone else, I hope you have a fabulous Tuesday!!  Thank you so much for stopping by!  Happy Polishing!!


Monday, January 6, 2014

Review: Loreal Sexy in Sequins

Hey Y'all!! So how's the weather were you live?  It's miserable here!  Right now it's 30 degrees with a wind chill of 18.  In the south.  In Georgia.  And we're expecting a low of  6 tonight.  In the south.  In Georgia.  I can't even imagine how my friends in the north are making it.  Brrrrr....

But I do have a review for you today :)  I have Loreal Sexy in Sequins:
 
This is Loreal's entry into the textured polish craze (of which I'm a lover of).  This is Sexy In Sequins, a dark plum/eggplant purple in matte glitter with varying colors of purple (lilac to purple) sparkling glitters.  And it's DIVINE!!  The pictures show two coats without a top coat.
 This went on like a dream, perfect.  I did use two coats just to make sure the color was even.  And when using textured polishes, make sure that the first coat dries completely first.
 
 I can't even begin to tell you how much I love this polish!  And for a textured polish it's actually pretty smooth, very comfortable to wear.
This is the only one of the Loreal textured polishes I bought and now I can't wait to get the others.  I bought this at CVS for $6.99 and the price is why I only bought one.  I wanted to see how it was first.  Now, as soon as the weather gets above 20 degrees, I need to start hunting for the rest!  Don't make my mistake!  Buy each one that you like when you find them!!  They were actually a little hard to find here.

I hope you enjoyed today's post!!  I'll see you tomorrow.  Until then, please stay warm!! And Happy Polishing!!

Friday, January 3, 2014

Colorful Waves-Inspired by Robin Moses

Hey Y'all!!  Now before I start this, I realize that SO many of you are in way colder places this morning, but I'm a Florida girl and this, this right here, just ain't right!  I'M SO COLD!!!!!  It's in the low 20's and the wind chill is in the low teens.  I'm not made for this weather!  I'm from Florida!  I still live in the deep south!  And if that wasn't enough, Tuesday's high is supposed to be 27 degrees!!!!!  WTH????? And that's the day we're out for 13 straight hours!!!  I'm not going to make it!

So, for my possible last post because I may freeze and have to wait to thaw out, I have some Colorful Waves inspired by the incredible Robin Moses!
If you don't know who Robin Moses is, you have to go right now to her you tube channel and see for yourself.  She is incredible!!  She is such an artist!!  And she makes it look so easy (it isn't), she's just chatting and joking away while meanwhile she is painting these incredible portraits.  I'm such a huge fan!!  And it isn't that often she does something that I think I can do, but this time she did!!  To see her fabulous design, and to get the tutorial, simply click here to see the video.

She used glitter polish, foil and loose glitter for her design, and I used all nail polishes for mine.

I Used:
Butter London- HRH (frosty dark purple)
China Glaze- Pink Voltage (neon pink)
China Glaze- Nova (small and medium holographic glitter in clear base)
Finger Paints- Sparkle Top Coat (milky base with micro gold glitter)
LA Girls- Teal Dimension (teal jelly base with micro holo glitter)
Pure Ice- Jaguar (light old frost)
 
 
I hope y'all enjoyed today's design.  And in all seriousness, y'all be careful out there.  For everyone living in the US, this cold front is serious.  Make sure you stay warm!

Stay inside and check out Robin Moses' You Tube channel!  I'll see y'all later!!  Happy Polishing!!